Do you need to export your report history onto a spreadsheet? In this guide, we’ll show you how to use our Export History widget.
Overview
The History Tab on the GTmetrix Report allows you to visualize your historical data through a series of History Graphs.
It also provides more options to keep track of your webpage’s performance – you can get a spreadsheet version of your performance data by downloading a history.csv file.
In this guide, we’ll explain how to use the Export History widget to get the history.csv file.
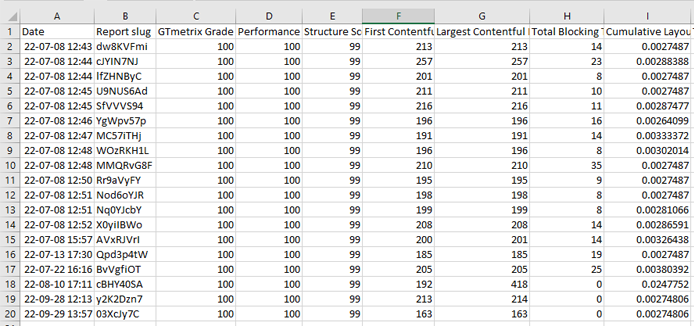
What’s in the History.CSV File?
You can select what data to include in the history.csv file, including:
- Date
- Report Slug
- Scores:
- GTmetrix Grade
- Performance Score
- Structure Score
- Performance Metrics:
- First Contentful Paint (ms)
- Largest Contentful Paint (ms)
- Total Blocking Time (ms)
- Cumulative Layout Shift
- Time to Interactive (ms)
- Speed Index (ms)
- Page Timings:
- Time to First Byte (ms)
- Redirect Duration (ms)
- Connect Duration (ms)
- Backend Duration (ms)
- Onload Time (ms)
- Fully Loaded (ms)
- Page Details:
- Total Size (bytes)
- Total Requests
- Legacy & Other Metrics:
- PageSpeed Grade (%) – Legacy Reports Only
- YSlow Grade (%) – Legacy Reports Only
- HTML Size (bytes)
- First Paint (ms)
- DOM Interactive (ms)
- DOM Content Loaded (ms)
- DOM Content Loaded Duration (ms)
- Onload Duration (ms)
How to Use the Export History Widget
Here’s how to export a history CSV.
Log into GTmetrix and visit the History Tab of a GTmetrix Report
Note that the report must have historical data (i.e., – more than one test run on it).
Click on the Export History button.
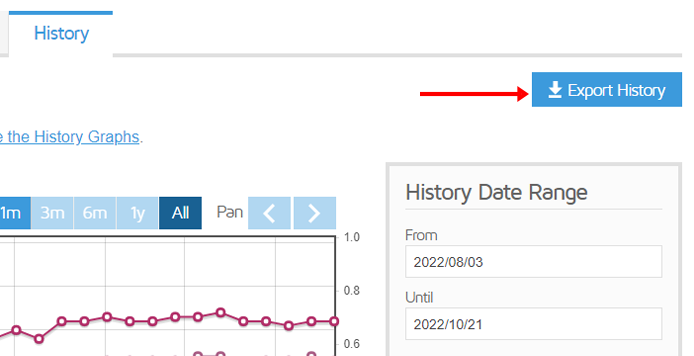
You should now see the Export History menu pop out.
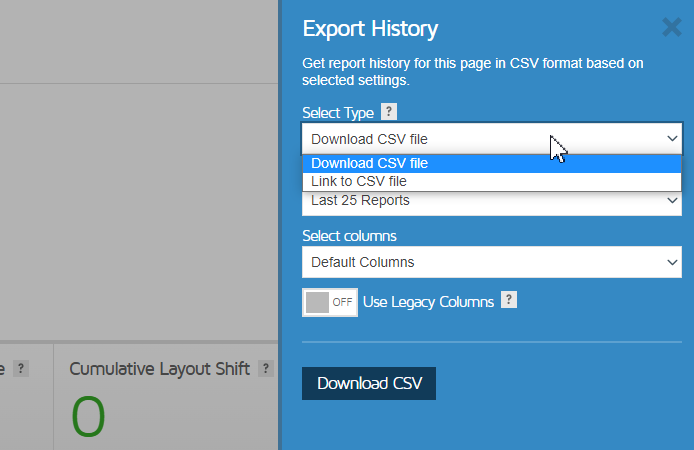
This menu has two main options that you can select using the Select Type dropdown:
- Download CSV file
Allows you to download a CSV file (history.csv) with your preferred selection of reports and performance data.
- Link to CSV file
Generates a link to the CSV file (with your preferred selection of reports and performance data), which you can use for external integrations (e.g., Google Sheets, Excel, etc.).
Here’s how to use both the options:
Download CSV file
In the Export History menu, select “Download CSV file” in the Select Type dropdown.
Select the time range of reports you wish to download, and which data columns you wish to display in the .csv file (or “All” if you want all the columns).
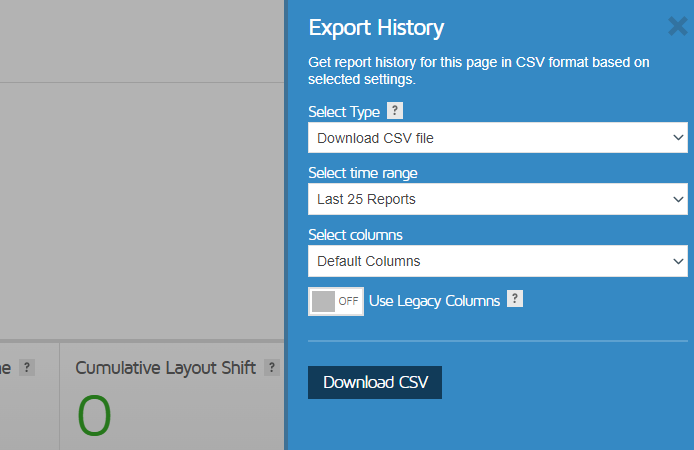
Once you’ve made your selections, click on Download CSV.
If you have a previous integration using the history CSV and need to preserve that legacy CSV format, toggle the Use Legacy Columns button.
Note that you cannot edit columns if you enable this option.
Link to CSV file
You must generate an API key before using the “Link to CSV” file option.
Ensure that you have an API key generated by visiting your Account page.

Generate your API key and validate your e-mail address if you haven’t already.
Next, in the Export History menu, select “Link to CSV file” in the Select Type dropdown.
You’ll see a preview of the link to the CSV file below the dropdowns.
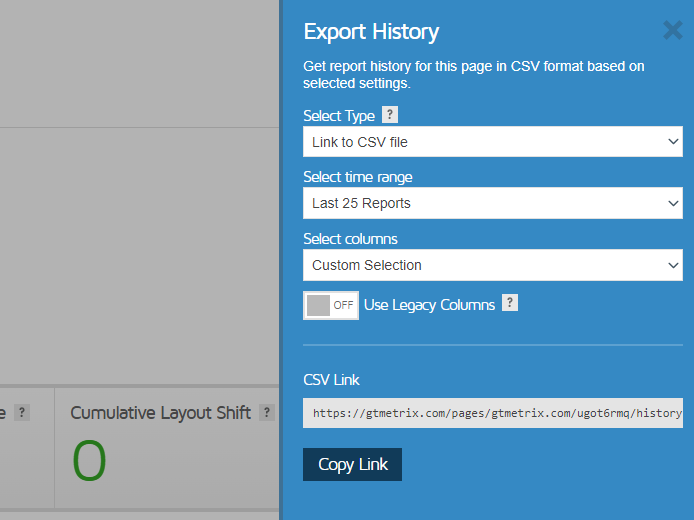
Select the time range of reports you wish to download, and which data columns you wish to display in the .csv file (or “All” if you want all the columns).
Once you’ve made your selections, click on Copy Link, and the link to your CSV file will be copied to your clipboard.
You can now paste this URL in your integrations that use CSVs for data ingestion – Google Sheets via the IMPORTDATA function for example.
If you have a previous integration using the history CSV and need to preserve that legacy CSV format, toggle the Use Legacy Columns button.
Note that you cannot edit columns if you enable this option.
How Much Data Can I Export?
Depending on your plan, the amount of historical data you can export will vary:
- Basic (Free) users: 1 week
- PRO – Micro plans: 1 month
- PRO – Individual plans (Solo, Starter, and Growth): 6 months
- PRO – Business plans (Champion and Team): 12 months
- PRO – Enterprise plans: 24 months
- PRO – Legacy plans: 12 months
Note that if you have a large amount of historical reports, your download will take a while to generate. You also must be logged into your GTmetrix account to download history.csv files.
Are you using our history CSV in an interesting way?
Let us know! We have users integrating their history CSV file with Google Sheets/Excel graphing, internal tracking tools, Google Drive linking and more.
Test with different countries, speeds and options
Get access to more Test Locations, Analysis Options and Connection Speeds!
Sign up for a Basic GTmetrix account and see how your site performs in more scenarios – It’s FREE!
Get Mobile Testing, Premium Locations, and more
Get more On-Demand Tests, Monitored Slots and Premium Test Locations along with Hourly testing with a GTmetrix PRO plan.
Upgrade to GTmetrix PRO and see how your site performs in all scenarios.