This article may contain outdated material
This optimization guide pertains to the legacy version of GTmetrix.
A step-by-step guide on how to optimize your WordPress installation.
Overview
Many of our users run WordPress either as a CMS or blog platform. With a lot of great plugins available, it’s easy to create a full-featured website with a lot of neat functionality. These plugins however, can insert additional CSS and JavaScript files into your header which can hurt your site’s performance (and PageSpeed and YSlow scores).
How does your WordPress site score?
We’ve listed some plugins and written some recommendations for our WordPress users seeking optimization help.
Note: These plugins address mainly front-end optimization issues only. If your site still takes a long time to load, an improved server or back-end code optimizations is what will make a real difference. Read more about our WordPress Hosting Service.
***Optional First Step*** Download and activate GTmetrix for WordPress
Download GTmetrix for WordPress here
Use this plugin to get a before snapshot of your WP performance.
Note: We are currently working on a maintenance update of GTmetrix for WordPress. While it hasn’t been updated in a while, it has been tested and still works for the latest version of WordPress (4.2.2), excluding some small formatting issues.

Once you’ve installed it, enter your API key from your GTmetrix account in the Settings page (you must be registered to generate an API key).

After this is done, visit “Tests” and under the “Latest Front Page Score” module, click “Test your Front Page now” button.

A report will be generated with PageSpeed and YSlow grades for the front page of your WordPress site. This is your before performance.
Step 1) Download and activate W3 Total Cache
You’ll notice a new section in your admin sidebar called “Performance.”
a) Toggle All caching types
a) On the sidebar, click on the “General Settings” sub-section.
Under “General,” Check “Toggle all caching types on or off at once.”
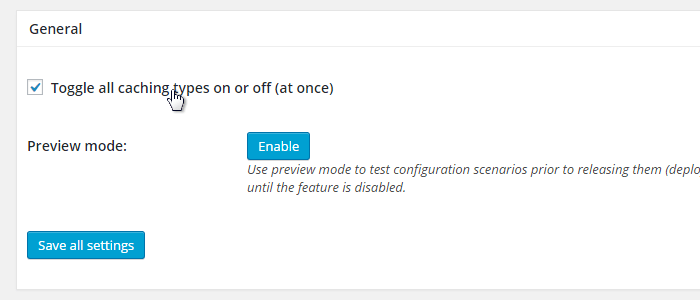
W3 Total Cache will turn on all its caching features (Page Cache, Minify, Database Cache, Object Cache, Browser Cache) as well as other features you may not need (CDN, Monitoring, etc.)
Uncheck CDN and Monitoring (and any other features) if you’re not using them.
b) Under the Minify subsection in General Settings, ensure Minify is enabled.
Next, look at the option called Minify mode. Select the Auto option.
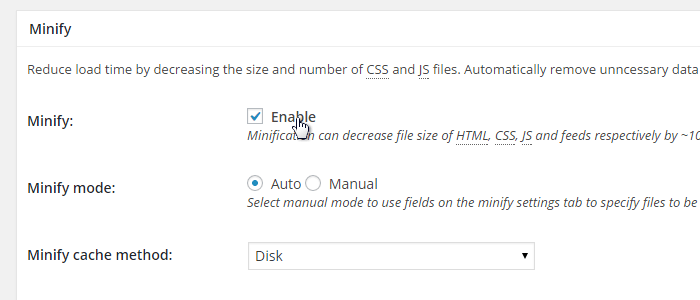
Click Save all settings.
Note: If you make any changes to your WordPress plugins, the W3 Total Cache plugin may ask you to Empty the Cache. This is done to make sure the plugin doesn’t serve a cached version of any changed files.
c) On the sidebar, click on the Minify sub-section
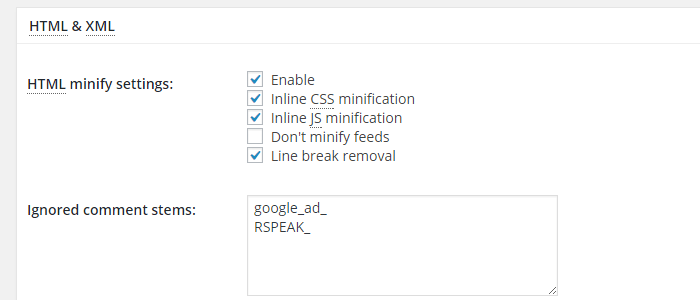
Under HTML & XML, check Enable in the HTML minify settings. You can also enable the other options (Inline CSS/JS minification and Line break removal), but make sure to test your site to see if it breaks.
d) On the sidebar, click on the Browser Cache sub-section
Under General, Cascading Style Sheets & JavaScript, HTML, and Media & Other Files headings enable the following:
- Set expires header
- Set cache control header
- Set entity tag (eTag)
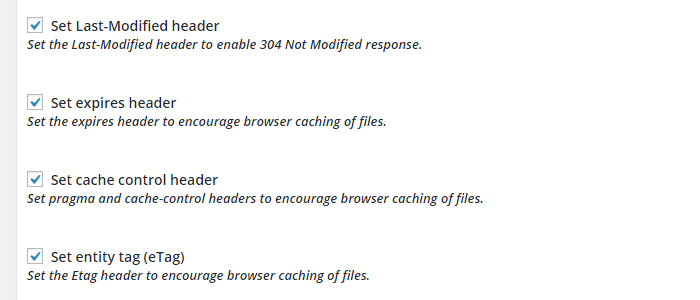
Click Save all settings.
Step 2) Download and activate WP Smush
Under the “Media” section in your WordPress sidebar, you’ll see a new menu option called “WP Smush”
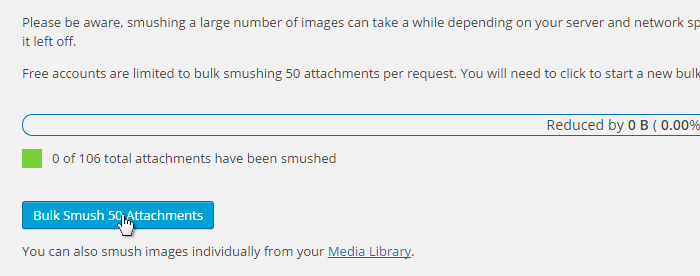
In this section, ensure that the “Auto-Smush Images on upload” feature is checked. The plugin will now optimize every image you upload henceforth since you activated it.

Next, smush all of the images in your Media Library by clicking on “Bulk Smush 50 Attachments” (The free version of the plugin is limited to bulk smushing 50 attachments at a time. You’ll need to revisit this page and bulk smush the next 50 attachments).
That’s it! You’re finished.
Step 3) Analyze your site
Analyze your site again (via GTmetrix.com or with our plugin) and see the difference in performance!
Summary
After testing and playing around with many similar plugins, we’ve found that the combination of W3 Total Cache and WP Smush provide the most effective and simplest way to improve the performance of your WordPress website.
Take a look at the difference in our blog:
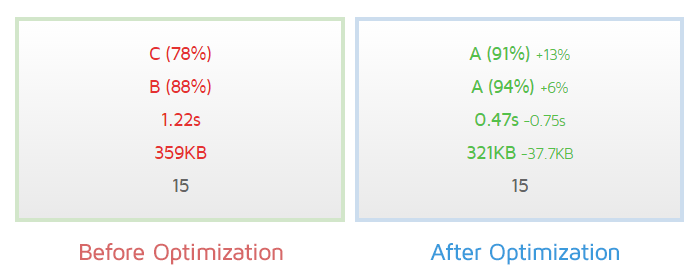
If you have a WordPress blog, slow or not, give these plugins a try and improve your user’s experience!
Need help? Hire a Developer
We only recommend products and services that we’ve reviewed and tested ourselves. Below you’ll find affiliate links to our optimization partners – If you decide to purchase their services through the links provided, we may be paid a commission at no extra cost to you.
Is your WordPress site still running slow?
We recommend finding help using one of our optimization partners. They’re a great option for website owners that want to improve performance, but don’t have the technical skill to implement optimizations.
Have a look at our partners below:
Need help? Hire a Developer
We recommend finding help on Fiverr. This is a great option for website owners that want to improve performance, but don’t have the technical skill to implement optimizations.
Visit Fiverr, register for an account, and search for a speed optimization service that matches your platform, whether it’s WordPress, Magento, Shopify, Squarespace, Opencart, etc.
Find an expert to help with your site today
