Last Updated:
We show you how to connect the GTmetrix MCP with ChatGPT Classic (aka the regular ChatGPT desktop app).
Overview
The GTmetrix MCP can be connected to ChatGPT Classic (formerly known as ChatGPT) in order to integrate GTmetrix workflow directly into the ChatGPT Classic app.
In this guide, we’ll show you how to connect the GTmetrix MCP to the ChatGPT Classic app with step-by-step instructions.
ChatGPT vs ChatGPT Classic
This guide is for the new ChatGPT Classic desktop app that was formerly the regular ChatGPT app.
The new ChatGPT desktop app now includes Codex and ChatGPT Work. Learn how to connect GTmetrix MCP with the new ChatGPT desktop app here.
How to Connect GTmetrix MCP to ChatGPT Classic
You can connect the GTmetrix MCP to ChatGPT Classic with just a few clicks.
Note that the connection procedure is the same on both the desktop app (ChatGPT Classic) and the browser version.
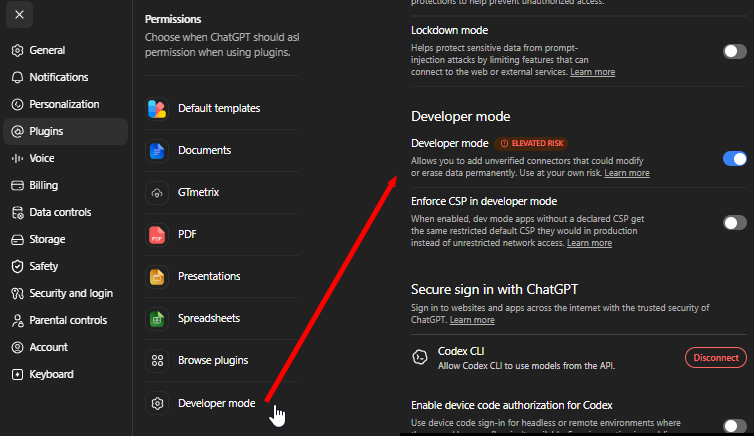
1) Enable “Developer Mode”
Click on “Settings” on the bottom left corner, navigate to Plugins using the sidebar and enable Developer mode.
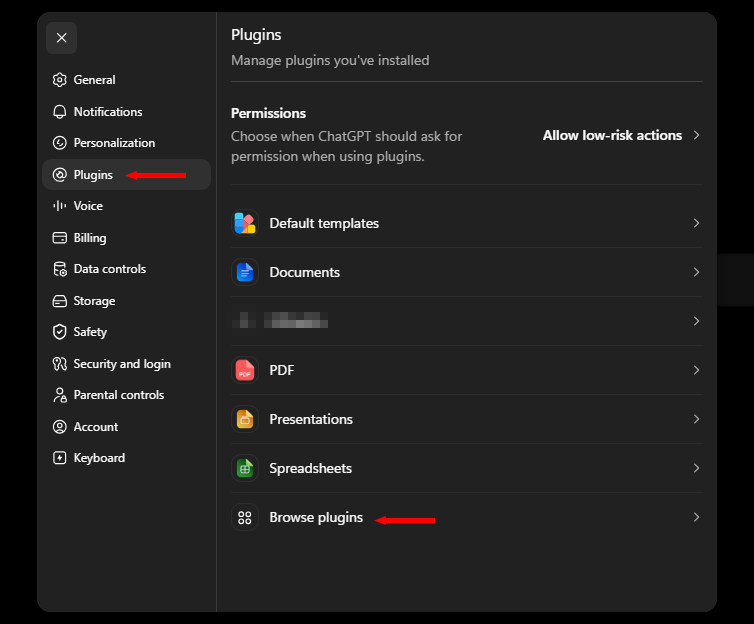
2) Click on “Browse Plugins”
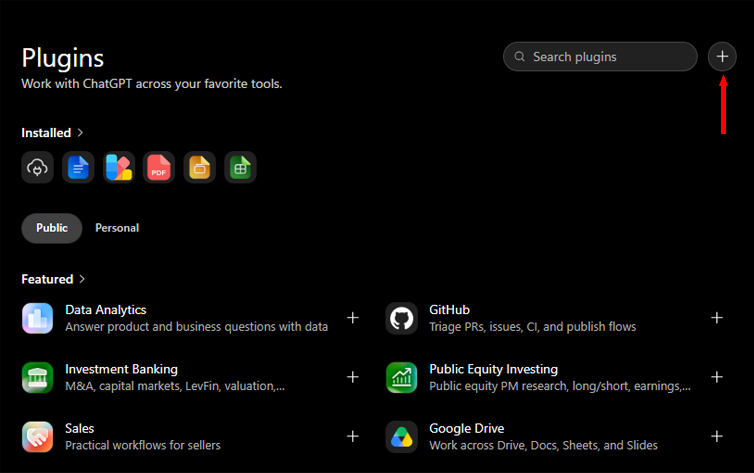
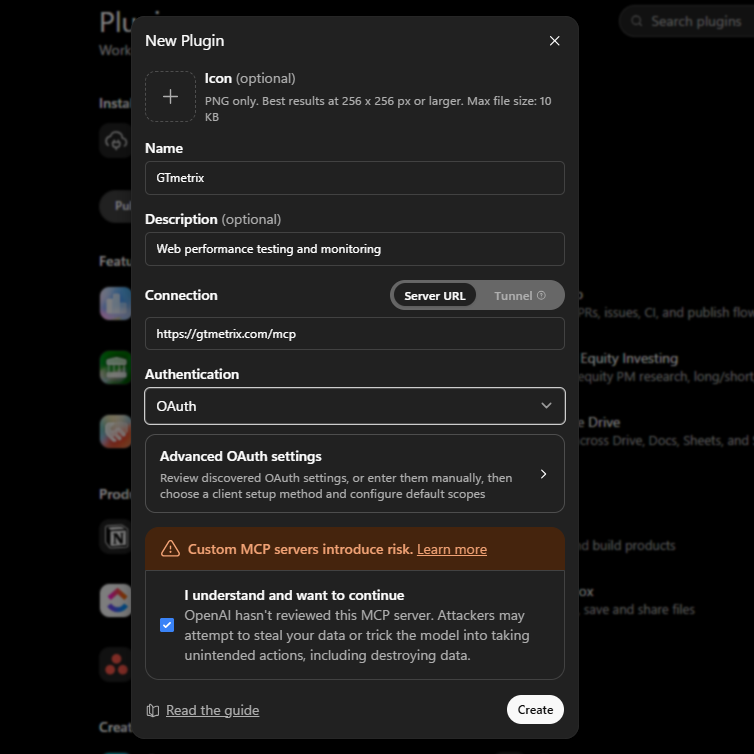
3) Click on “+” to add a new Plugin
4) Enter MCP details
Name: GTmetrix
Connection: https://gtmetrix.com/mcp
The Description is optional. Make sure the Authentication method chosen is “OAuth“. Do not change any of the default or Advanced OAuth settings.
Click “Create” once you’ve entered the required details.
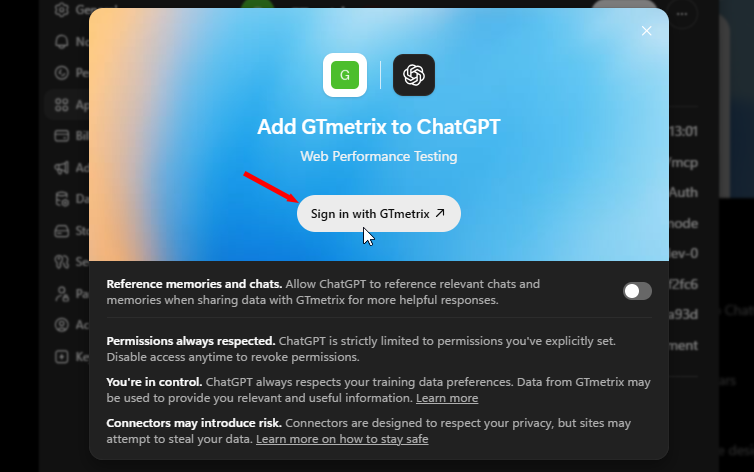
5) Click the “Sign in with GTmetrix” button
Initiate the connection to the GTmetrix MCP by clicking the Sign in with GTmetrix button.
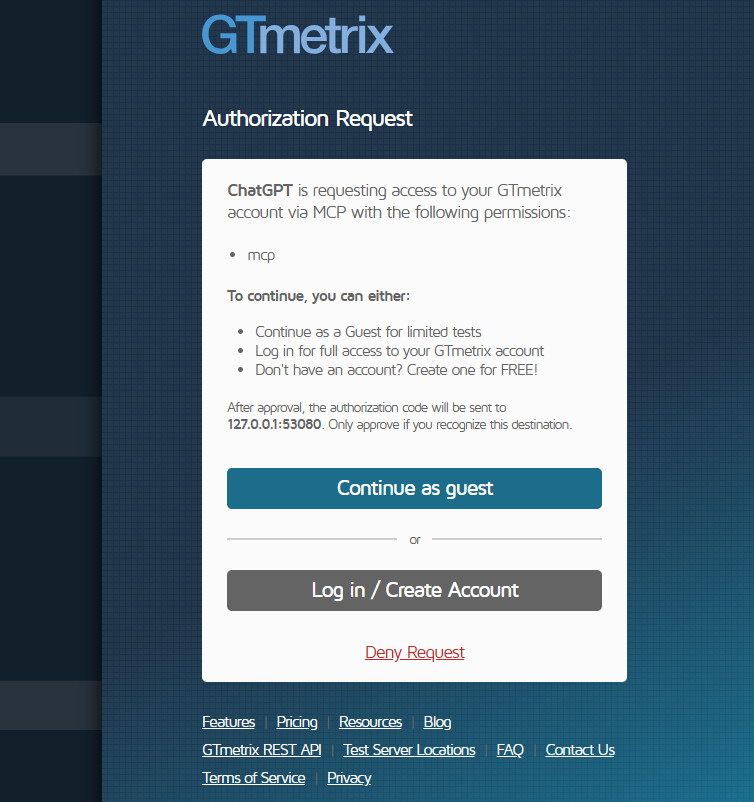
This will launch a new browser window asking you to authorize the connection to the GTmetrix MCP.
6) Authorize your Connection
If you wish to continue without creating an account, click on Continue as guest – note that guest testing is highly limited and you’ll need to reauthorize the connection with your GTmetrix account after your Guest API credits have been used up.
Create an account or login to your GTmetrix account for full access.
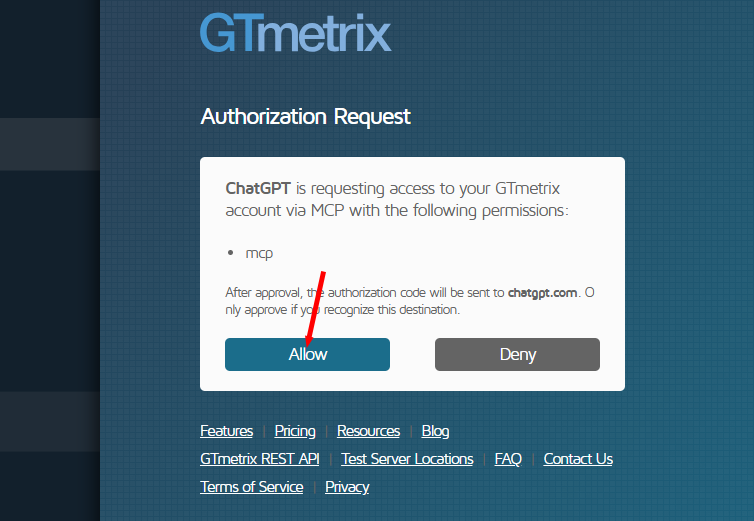
Next, click on Allow to authorize your connection.
A success screen should appear when the connection is successfully established.
7) Verify GTmetrix tools
Back in the “Plugins” menu, you’ll see the GTmetrix MCP now active.
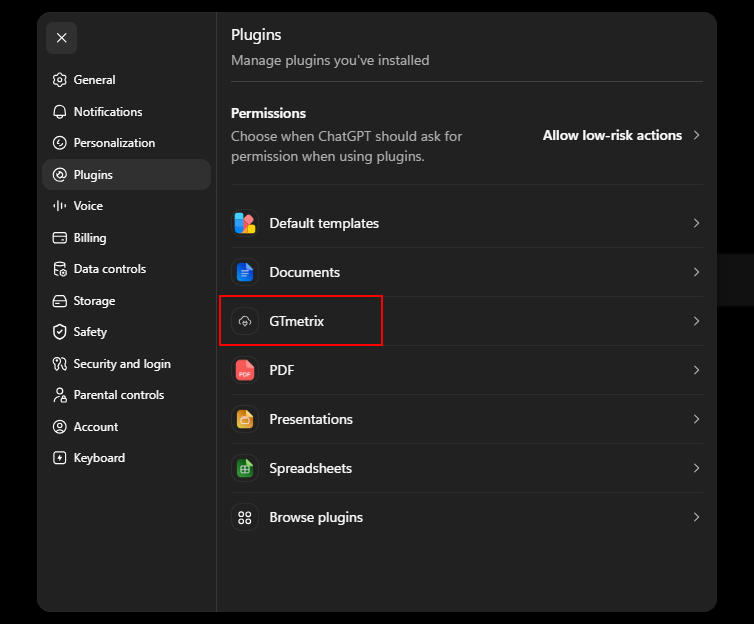
Click on GTmetrix to open the MCP Preferences, then scroll down and you should see the various active tools (e.g., gtmetrix_get_account_status, gtmetrix_get_catalog, etc.).
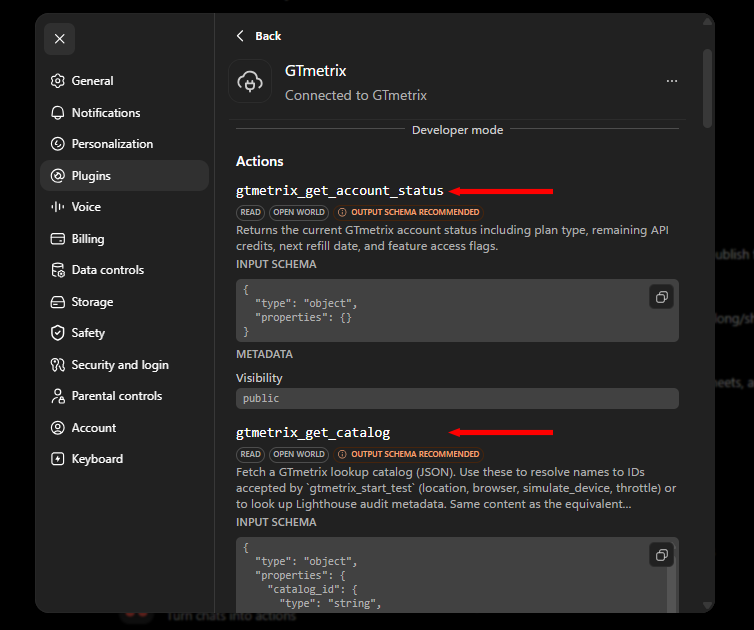
8) Restart ChatGPT Classic and Confirm Connection
Make sure to quit the app entirely and restart to apply the changes!
Quit the ChatGPT Classic application properly and launch it again.
For ChatGPT browser, close and reopen the tab to start a new session.
To confirm the connection, start a new chat and ask ChatGPT Classic if it can see the GTmetrix MCP tools.
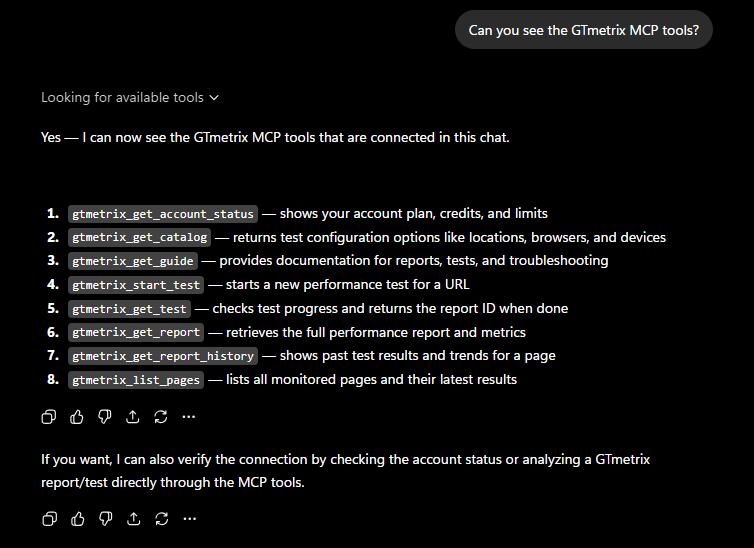
If ChatGPT Classic responds with a list of GTmetrix tools, you know that the connection was successful and you can now start interacting with it and get it to use GTmetrix.
Summary
Connecting the GTmetrix MCP to ChatGPT Classic is quick, simple, and can be done with just a few clicks.
Use the GTmetrix MCP connection to bring your GTmetrix workflows directly into the ChatGPT Classic desktop app.
Get ChatGPT Classic to start GTmetrix tests, test in different scenarios (locations/devices/connection speeds, etc.), compare results, and help you understand what’s slowing down your page and how to fix them.
Give this a try and let us know if you run into any bugs or issues.
Unlock More API Credits for ChatGPT Classic Powered Performance Testing
Run more tests with additional API credits. Use GTmetrix MCP inside ChatGPT to automate testing, compare results, access history, and surface actionable insights.
Available with select PRO plans (excluding Lite plan).
Other features include: Priority access for tests, More Monitored Slots, Access to more locations, Remote Location Monitoring, Complete Mobile testing suite, and more!