
Last Updated:
Learn how to use the Team Logins feature in GTmetrix.
Basics of Team Logins
Team Logins allow you to share your GTmetrix PRO account with other members of your team/organization without having to share a single login for the account.
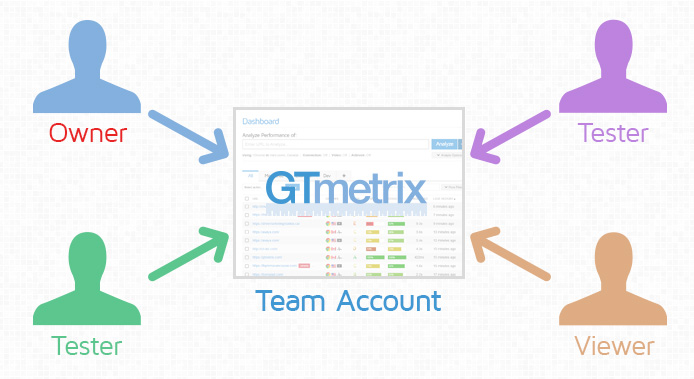
All members of a team can login to their own GTmetrix account yet have access to the same Dashboard of the PRO account.
Each role comes with a set of permissions and privileges, allowing you to provide tiered access to users on your team. You can also configure Alerts for monitored pages to be sent to multiple Team Members.
Team Logins are available on Expert, Champion, Team and Enterprise plans (or as an add-on to Custom plans).
In this detailed guide, we’ll breakdown how the Team Logins feature works and how to use it.
Setting up and Managing Your Team
In this section, we’ll show you how to set up and manage your team.
Creating a Team
Follow the steps below to create a team:
Step 1) Locate the Team Settings menu on your Account page
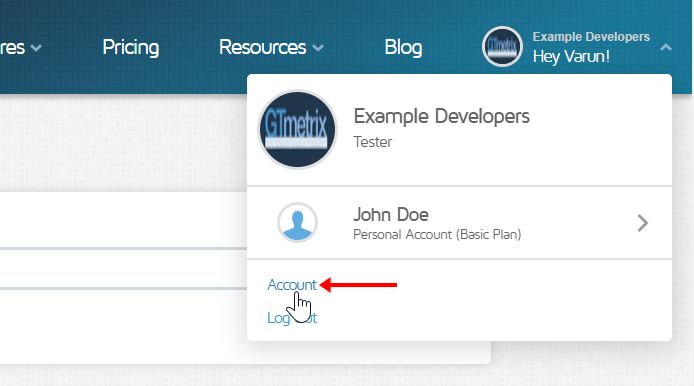
Click on Account on the top right hand corner of the page.
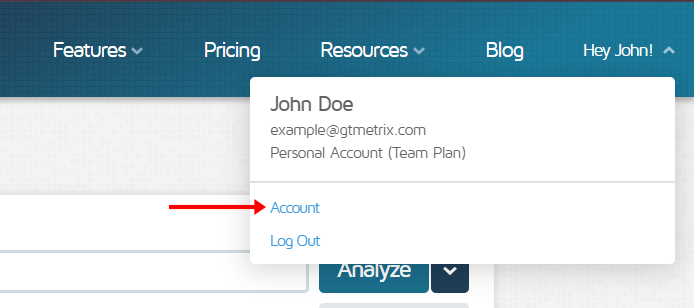
You should see the Team Settings menu under the PRO Settings box.
Click on Create Team Profile.
Step 2) Select a name and avatar for your team
A new menu pops out where you can select a Team Name and choose a logo/avatar for your team (optional).
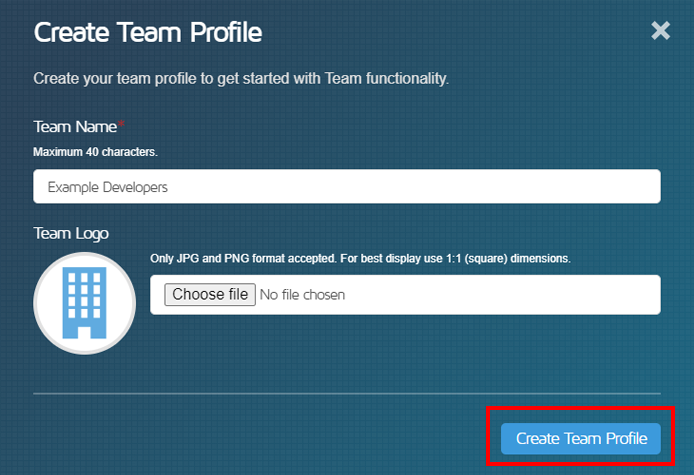
Once complete, Create Team Profile will become Edit Team Profile. You can edit your Team Name and upload/change the Team Logo at any time.
Now that your Team is created, you can start inviting Team Members.
Inviting Team Members
There are two ways of inviting Team Members:
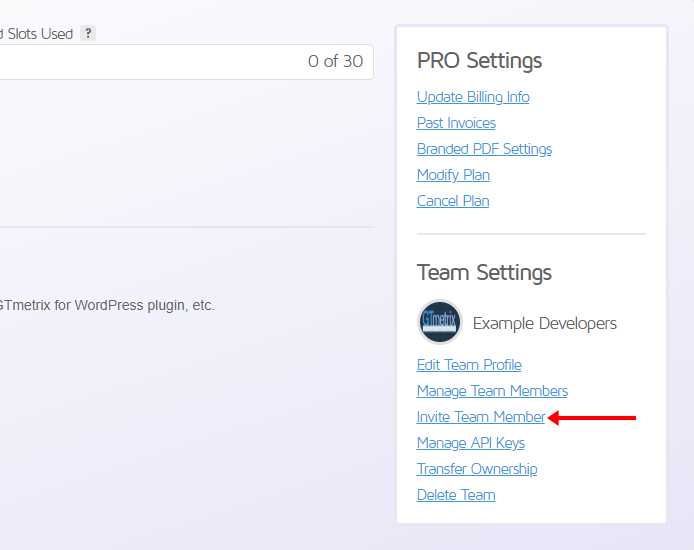
Click on “Invite Team Member” in the Team Settings menu
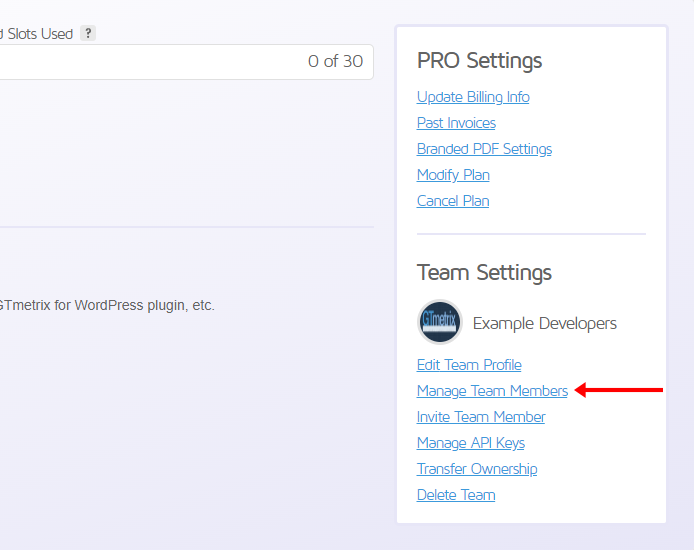
Click on “Manage Team Members” in the Team Settings menu
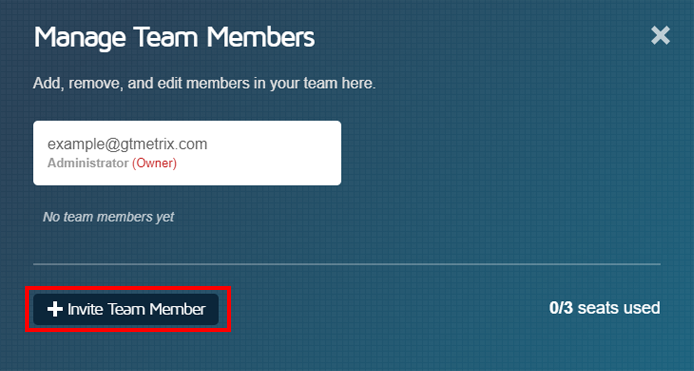
The Manage Team Members menu pops out where you can add, remove, or edit Team Members. Click on Invite Team Member.
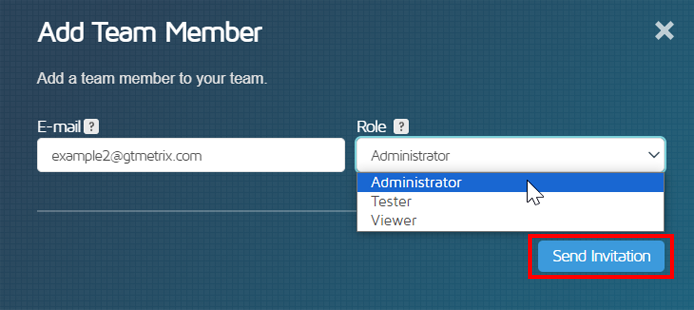
In both the cases, the Add Team Member menu pops out. You can now input the the e-mail address of the member you wish to invite and select a role for them. Click on Send Invitation when you’re done.
Here are a few notes about inviting Team Members:
- GTmetrix accounts will only be created for the specific e-mail the invite was sent to.
- You can rescind an invitation by clicking on Cancel next to the invited member’s e-mail in the Manage Team Members menu.
- If you wish to change the e-mail address of the member you’re inviting, you’ll need to cancel the pending invite and resend the invite to the new e-mail address.
You can set the role as Administrator, Tester, or Viewer – we elaborate on the roles below.
Team Roles
In total, we have 4 roles for accounts with Team Seats. We explain what each role can do in the table below:
| Action | Viewer | Tester | Administrator | Owner |
| View / Compare Reports | ✓ | ✓ | ✓ | ✓ |
| Test /Re-Test URLs | ✕ | ✓ | ✓ | ✓ |
| Create Filters / Tags | ✕ | ✓ | ✓ | ✓ |
| Set Alerts for Monitored Pages | ✕ | ✓ | ✓ | ✓ |
| Manage Team Members (Add/Remove/Edit) | ✕ | ✕ | ✓ | ✓ |
| Manage API Keys for Team Members | ✕ | ✕ | ✓ | ✓ |
| Create / Edit Team Profile | ✕ | ✕ | ✕ | ✓ |
| Manage Subscription / Payment Details | ✕ | ✕ | ✕ | ✓ |
Note that we may add more roles in the future.
Managing Team Members
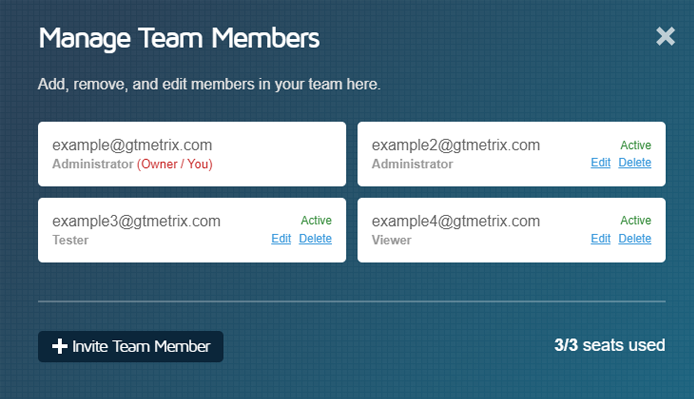
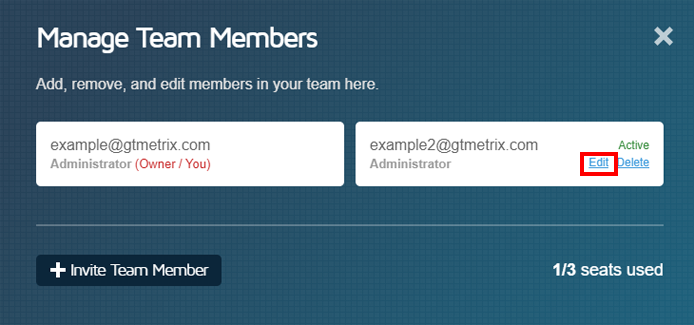
The Manage Team Members menu allows Administrators and Owners to see who is in your team, along with their role and current status.
Using this menu, you can add, remove, and edit members on your team. You can also see how many of your allotted Team Seats you’ve used.
We cover each of these functions below:
Adding a Team Member
As mentioned previously, you can add a Team Member by clicking on Invite Team Member in the Manage Team Members menu.
Note that you can also add a Team Member directly from the Team Settings Menu (on the Account page) by clicking on Invite Team Member.
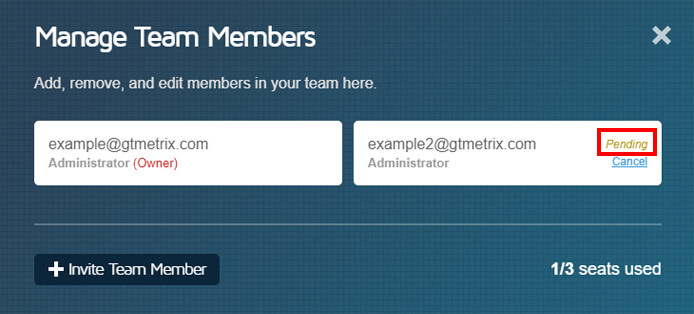
Once an invite has been sent, the Manage Team Members menu shows a Pending status for the invited Team Member until the invite has been accepted. You can cancel the invite as long as they have not accepted the invite yet.
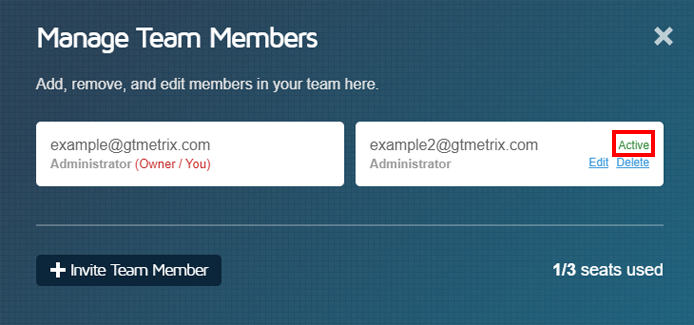
E-mail notifications are sent to the Owner, Administrator, and the Team Member once the invitation has been accepted. The Pending status also changes to Active.
You can continue adding more Team Members in the same manner as long as you have vacant seats on your team.
Removing a Team Member
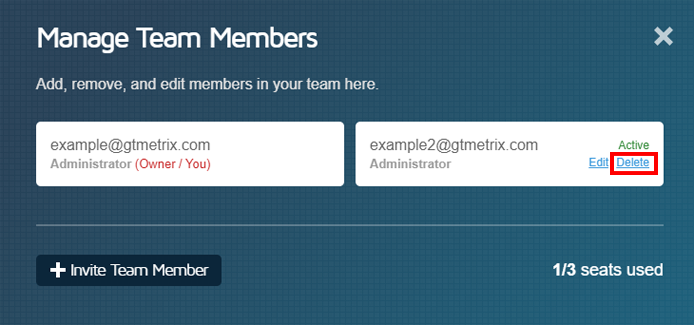
To remove a Team Member, click on Manage Team Members in the Team Settings box on your Account page.
Click on Delete next to the Team Member you wish to remove.
A warning prompt appears asking you to confirm the selection. Click on OK to proceed.
E-mail notifications are sent to the removed Team Member, as well as the Administrators and the Owner.
Editing a Team Member’s Role
Administrators (and the Owner) can also remove or change the roles of other Team Members from the Manage Team Members menu.
Click on Edit next to the Team Member whose role you wish to change (or remove from the team) to open the Edit Team Member menu.
Use the Role dropdown to change the role of this Team Member, then click on Save Settings.
E-mail notifications are sent to the affected Team Member, as well as Administrators/Owner.
If you wish to remove the Team Member from your team, click on Delete (for the relevant Team Member) in the Edit Team Member menu.
A warning prompt appears asking you to confirm the selection. Click on Confirm to proceed.
E-mail notifications are sent to the removed Team Member, as well as the Administrators/Owner.
Note that a deleted Team Member will lose access to your Team account and they will need to be invited again in order to regain access.
General Team Usage
We’ve covered some important functionality items for Owners and Administrators. In this section, we’ll go over some general team usage functionality:
Accepting a Team Invite
When an Administrator (or Owner) invites a Team Member to join their team, the respective Team Member receives an e-mail invitation (Team Administrators including the Owner are also notified).
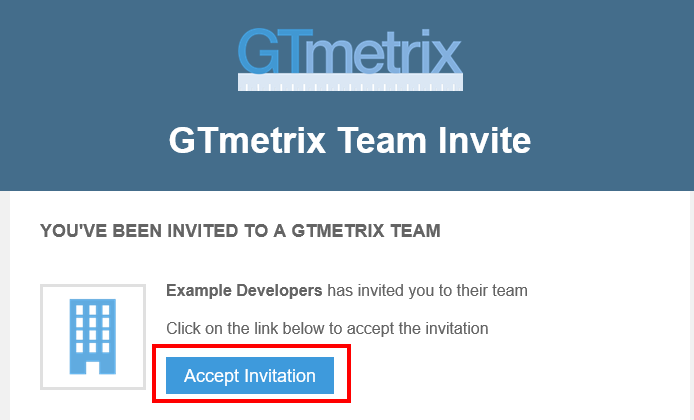
Once the Team Member accepts the invitation, they will be taken to the GTmetrix site to login or create an account.
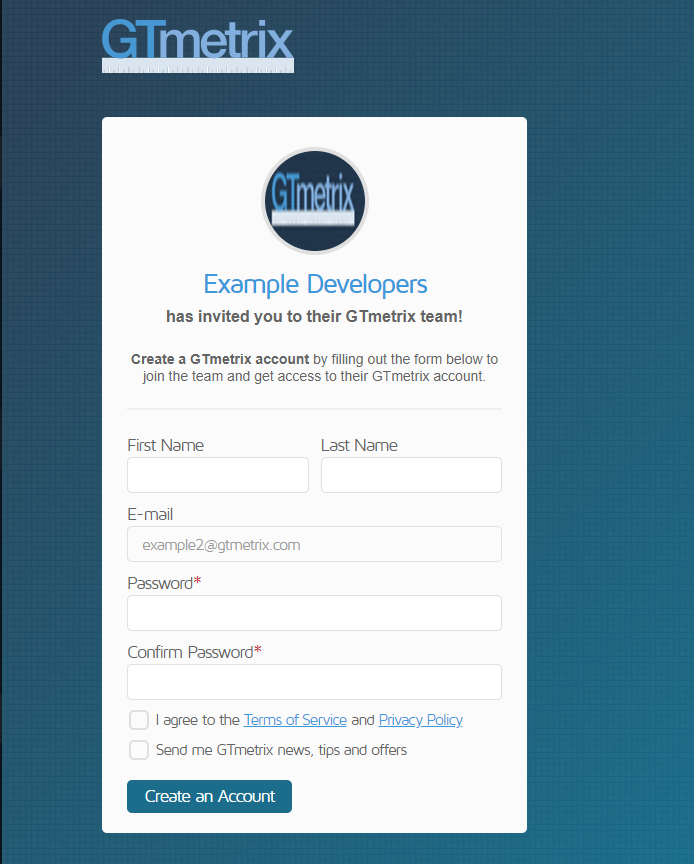
If they do not have a GTmetrix account, they will be prompted to create one.
If the Team Member already has a GTmetrix account, they will need to login to their account.
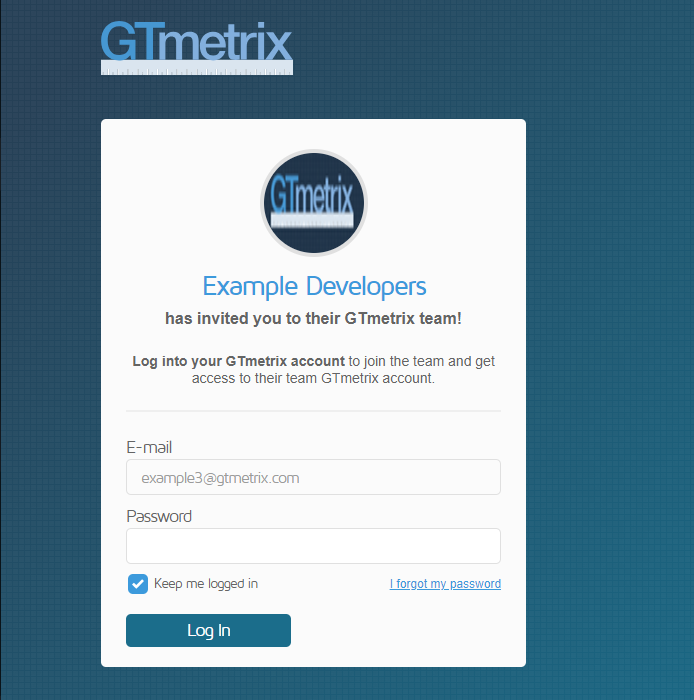
Once they’ve logged in, they will be notified that they have joined the team.

The Owner and the Administrators are also notified via e-mail that the Team Member has joined their team.
Accessing and Using the Team Account
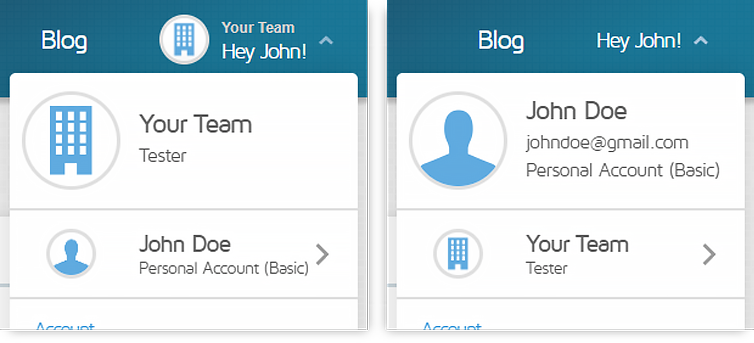
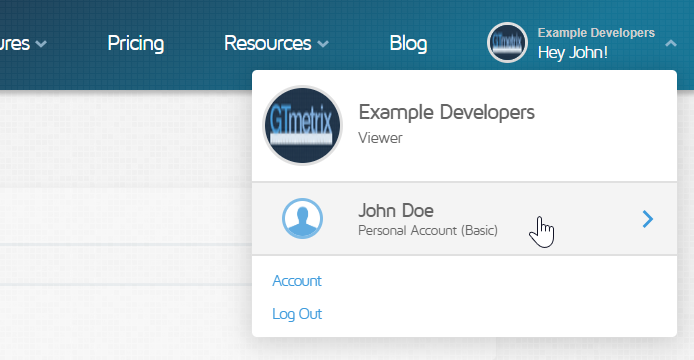
Once you’ve joined the Team and logged into your GTmetrix Account, you will have access to both your Personal Account AND your Team’s Account.
Use the top right dropdown to switch between accounts.
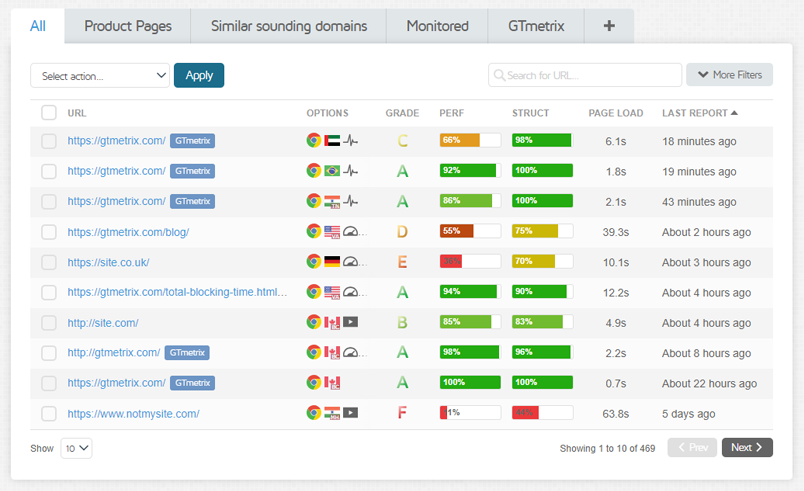
When you’re in the Team Account, your team’s activities will be viewable and accessible to all members of the Team.
Note that except for the Viewer role, all other Team Members can use the Team Account to test, monitor and set alerts, create filters and tags, add notes to History Graphs, and delete reports.
Refer to our roles table to learn more on which roles have access to different features.
Leaving a Team
Any Team Member can choose to leave the team at any time. We explain the steps involved in leaving a team below:
1) Login to the Team Account and visit the Account page
If the Team Member is already logged into GTmetrix with their Personal Account, they will need to switch to their Team Account using the dropdown on the right hand corner.
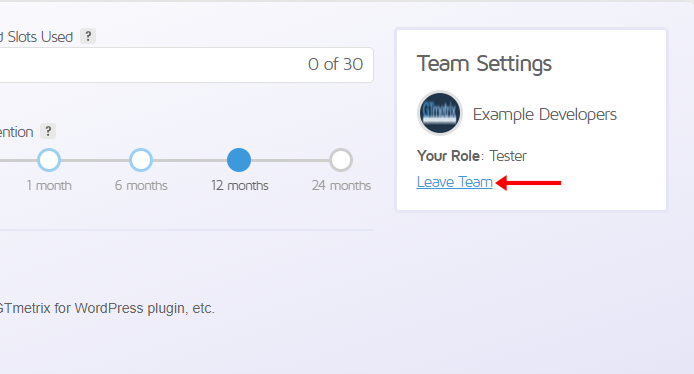
In the Team Settings menu, click on Leave Team.
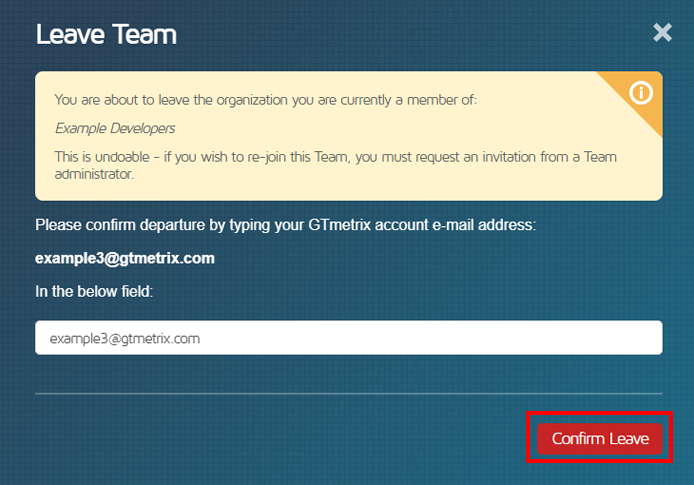
2) Enter your account e-mail address and click on “Confirm Leave”
Note that you will not be able to leave the team until you enter the correct account e-mail address.
Once the Team Member confirms, they will receive an e-mail notifying them of their departure from the team. The Team Administrators and Owner are also notified of the Team Member’s departure.
Managing API Usage
All Team Members have access to the GTmetrix API and will need API keys for authentication.
Only Administrators and Owners can manage API keys.
API Keys can be generated, regenerated, and deleted, based on your workflow. We show you how to do this below:
1) Login to the Team Account and visit the Account page
2) In the Team Settings menu, click on Manage API Keys

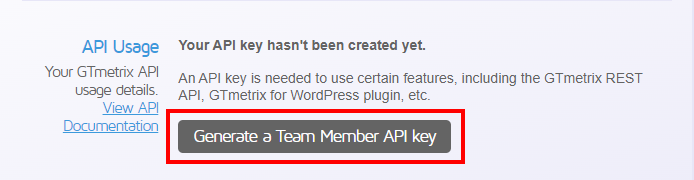
Alternatively, if you have not created your own API key yet, you can also click on Generate a Team Member API key in the API usage section of the Account page.
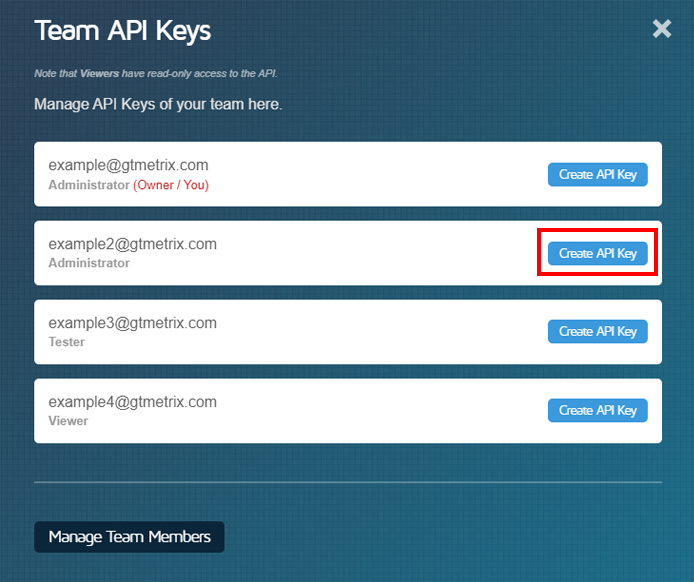
You should now see the Manage API Keys menu.
3) Click on “Create API Key” next to the member you wish to generate an API key for
Once you’ve created API Keys for the desired Team Members, you can also regenerate and delete them from the same menu.
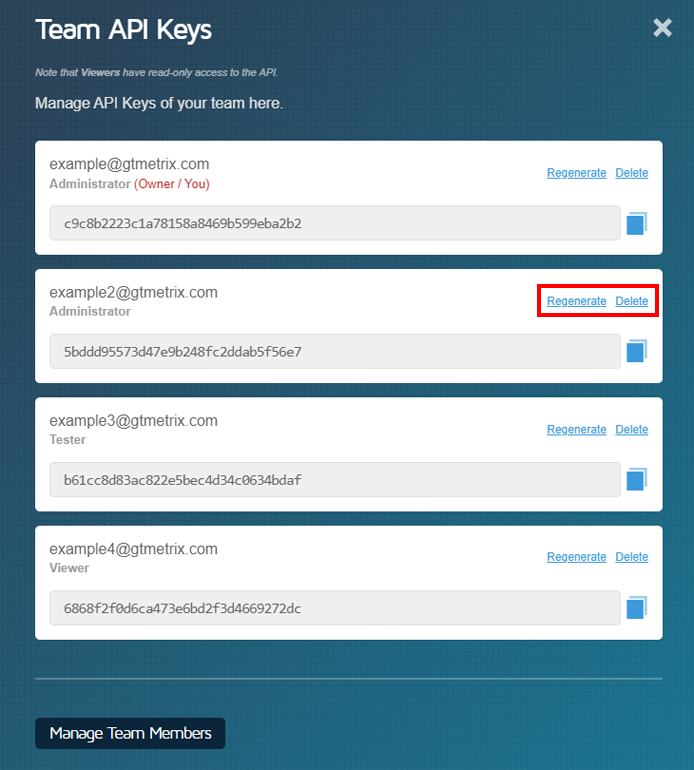
Whenever an API Key is generated, regenerated, or deleted, e-mail notifications are sent to the respective Team Member, Administrators, and Owner.
Note that Viewers have read-only access to the GTmetrix API i.e., they cannot perform any functions that consume API credits.
Setting up Alerts
GTmetrix Alerts can be used to notify your team of any performance changes (i.e., spikes/dips) on your monitored pages.
Administrators, Owners, and Testers can enable monitoring and set up Alerts for pages.
We’ve previously written a guide on setting up monitoring and alerts for your pages.
You can also configure Alerts to be sent to multiple Team Members. We show you how to do this below:
1) Open the monitored GTmetrix Report
An easy way to identify monitored reports is through the monitoring symbol on the Dashboard or the monitored job text next to the Report Generation time.
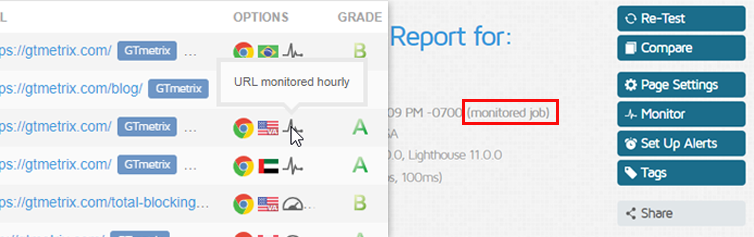
You may need to generate a GTmetrix Report first and enable monitoring for that particular page. We show you how to do this in our monitoring guide.
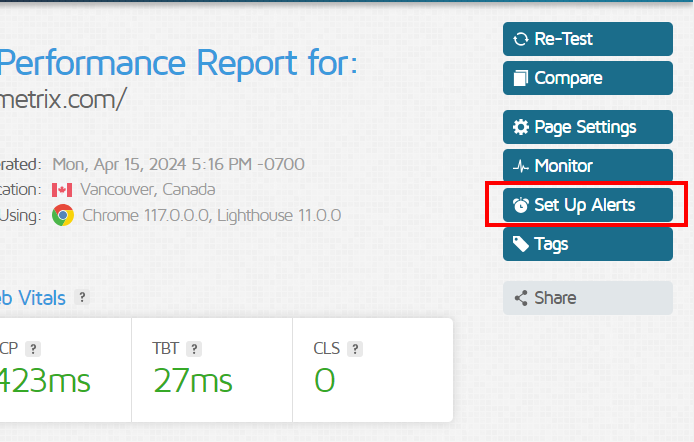
2) Click on “Set Up Alerts”
The Set Up Alerts menu should now pop out.
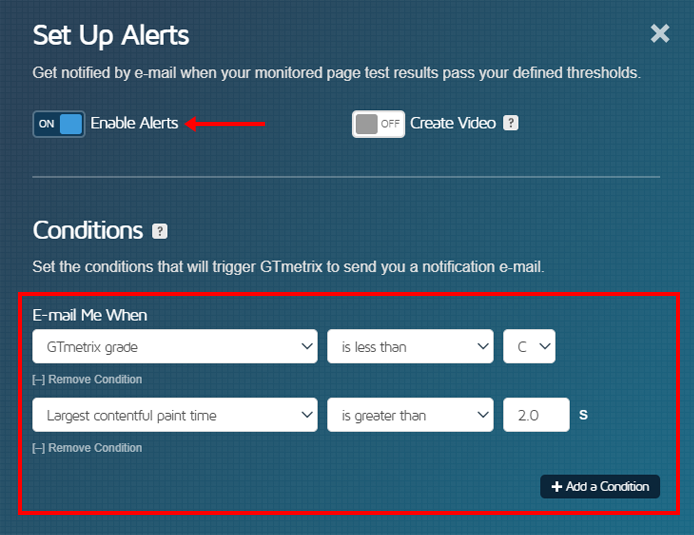
Click on Enable Alerts to reveal the Alert Conditions, then select your desired Alert Conditions.
Now, select which members should receive Alerts for this page in the Send To section and then click on Save Settings when you’re done.
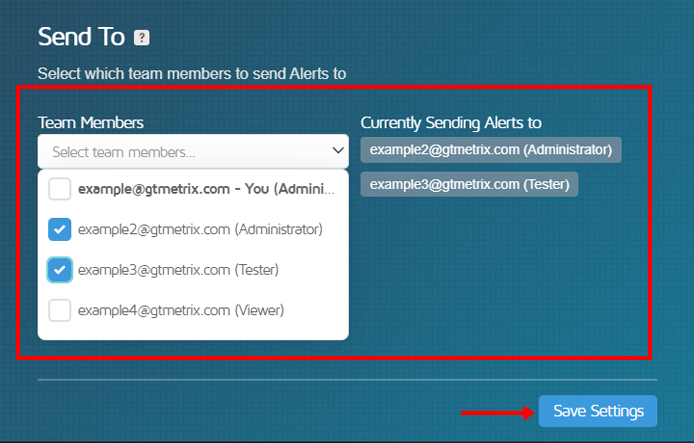
Note that only active Team Members can be added to receive Alerts.
Notes on Alert Deliverability
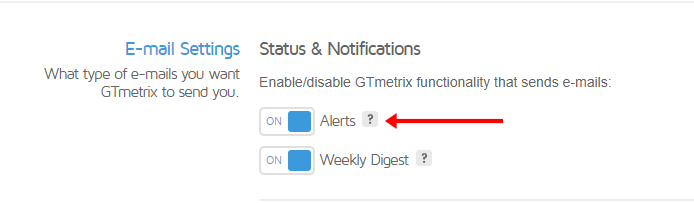
- The Team Account must have Global Alerts enabled in the Account page.
 Global Alerts must be enabled on your Team’s Account Page.
- Note that the “Enable Alerts” setting for your Personal Account is different and only covers Alerts for pages monitored on your Personal Account.
- The GTmetrix Report must have Alerts enabled.
Deleting Team
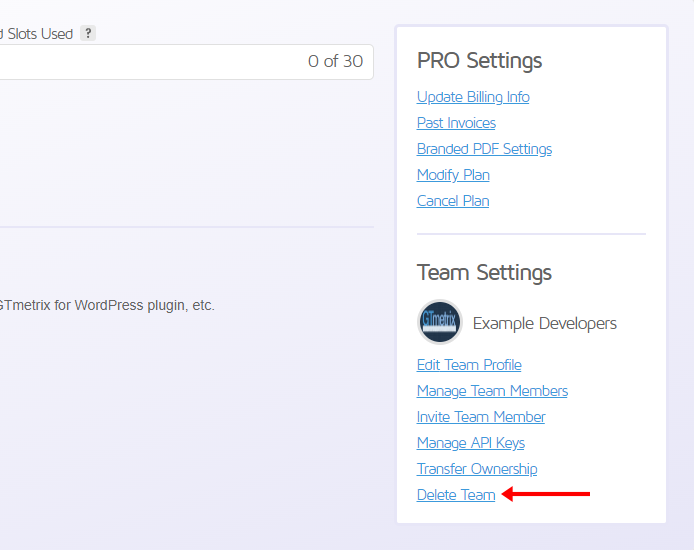
Only the team’s Original Owner (i.e., whoever signed up for the PRO plan) can delete a team. To do so, visit your Account page and click on Delete Team in the Team Settings.
A new menu pops out with a warning notifying you of what will happen if you delete the team. To proceed, input your e-mail address in the field below and click on Confirm Delete.
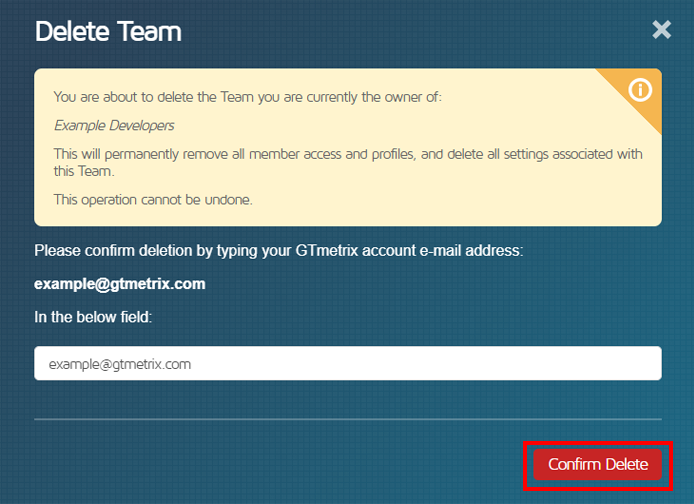
Upon confirmation, your team will be deleted and all members of your team will be notified that they have been removed from the team. Your report data will remain in your Personal/Team account.
If ownership was transferred to you by the Original Owner or another Team Member, you cannot delete the team. You’ll need to contact us if you wish to do so.
Team Ownership
Now that we’ve covered the bulk of Team Logins functionality, we’ll explain more about the team ownership structure.
Here are some key points to note about the team’s Owner:
- Each team has an Owner i.e., the primary/core account holder who has control of the team’s GTmetrix PRO plan.
- The Owner is the only member that has access to the subscription and billing details.
- Owners alone are authorized to make changes to the subscription/billing information.
- A team can only have one Owner, but members can be a part of multiple teams.
- The Owner is also the only role allowed to delete a team.
- Ownership can be transferred from one GTmetrix account holder to another GTmetrix account holder. More on this below.
How to Transfer Ownership
You can transfer ownership of your GTmetrix PRO account from one GTmetrix account holder to another – here’s how:
1) As a Team Owner, visit your Account page and navigate to the Team Settings menu
Click on Transfer Ownership – A new menu should pop out.
2) Select which member you wish to transfer ownership to
Using the dropdown, select the member you wish to transfer ownership to.
Take note of the warning that explains what will happen to your account if you transfer ownership.
To proceed with the ownership transfer, click on Submit Ownership Transfer.
You will receive an e-mail asking you to confirm the ownership transfer. Click on the Confirm Ownership Transfer link in the e-mail to complete the process.
You will now see a message at the top of your Dashboard confirming that your ownership has been transferred.
Ownership Transfer Notes
- You can only transfer ownership of your team to existing Team Members.
- If you wish to transfer ownership to another GTmetrix account holder who is not already on your team, you’ll need to invite them to your team first before you can transfer ownership.
What happens if I transfer ownership of my team to another Team Member?
If you are the Original Owner of your PRO account (i.e., you originally signed up for the PRO account with Team Seats) and you transfer ownership, here’s what happens:
- You (the Original Owner) will lose access to your GTmetrix account entirely.
- The New Owner will now have access to the GTmetrix PRO account, along with all GTmetrix Report data generated through the PRO subscription.
- If the Original Owner and the New Owner both have API Keys set, you can choose which API key to retain for the New Owner when submitting the Ownership Transfer.
- If an API Key has not been generated for one of the Owners, then the active API Key will be used for the New Owner.
- You can also subscribe to a new PRO account and become an Owner of a different team.
Summary
Team Logins allow you to create a team and share your GTmetrix PRO account with other members of your organization without having to share a single login for the account.
If your GTmetrix PRO account comes with Team Seats, use this guide to learn everything about Team Logins.
If you have specific questions about certain Team Logins features, continue reading below for our Frequently Asked Questions (FAQ) section.
Frequently Asked Questions (FAQ)
Here are some common questions regarding Team Logins in GTmetrix.
Q) What counts as a Seat?
A) Seats are additional to your core GTmetrix account (AKA the Owner account).
For Example:
A GTmetrix Expert plan has 5 seats: 1 Owner Account + 5 Team Accounts = 6 Total User Accounts
Invited/Pending Members consume 1 Team Seat.
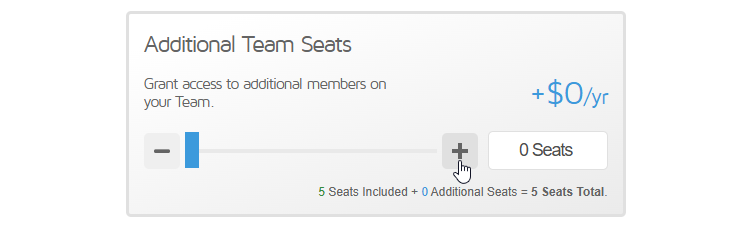
Q) Can I add more Seats to my PRO plan?
A) Yes – only the Owner can do this.
Owners can modify plan add-ons either from the Pricing page or the Account page.
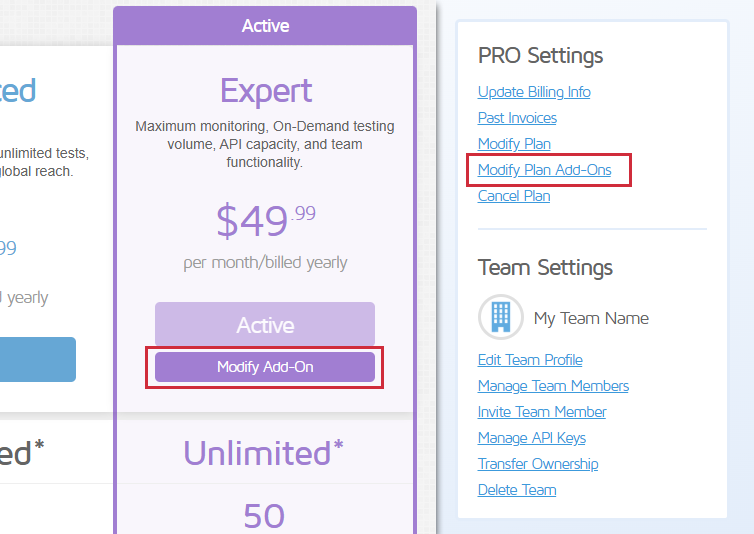
Additional Seats can be purchased for Expert, Champion, Team, Enterprise, and Custom plans.
Q) How do I change my Team Account e-mail?
A) Team Account e-mails and Personal Account e-mails are tied together.
Any changes to your account e-mail address must be made in your Personal Account’s User Settings.
Make sure you’re logged into your Personal Account (you can use the dropdown in the top right hand corner to switch between Personal and Team Accounts).
Visit your Account page and navigate to the User Settings and change your e-mail address there.
You will receive a notification e-mail confirming the e-mail address change.
Q) How do I send Alerts to specific or multiple Team Members?
A) We cover this in our General Team Usage section.
Only Testers, Administrators and Owners can set Alerts.
Visit the monitored GTmetrix page you wish to set Alerts for.
Click on Set Up Alerts on the right hand side of the monitored report, click on Enable Alerts, and set your desired Alert Conditions.
Under the Send to section, select the Team Members you wish to have Alerts sent to.
Team Members must have their Global Alerts setting enabled on their Account page in their Team profile.
Q) Can I send Alerts to somebody not on my Team?
A) No – Alerts can only be sent to active Team Members.
Q) What happens if my Team-enabled plan gets changed to a plan with fewer/no Team Seats?
A) Depending on whether your downgraded plan has no Team Seats or fewer Team Seats, here’s what will happen:
If the plan you have switched to has no Team Seats…
All members of your team will lose access to the Team Account and e-mails will be sent to notify all members.
For the Owner, the Team Settings section will be disabled on the Account page.
If the plan you have switched to has fewer Team Seats than the previous plan…
Excess Members will be removed/disabled from your team in the following order, until the seat limit is satisfied:
- Most recent Invited/Pending members are removed.
- Most recent Added Active Team Members are disabled.
Administrators/Owners can see who has been disabled by opening the Manage Team Members Menu.
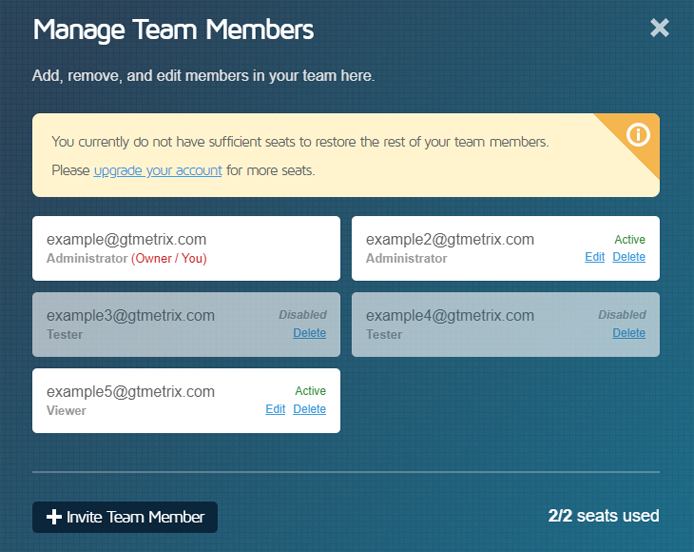
Disabled Team Members don’t have access to the Team Account entirely and will be notified by e-mail regarding their disabled status.
The Owner and any Administrators are also sent an e-mail with the list of Team Members who have been removed/disabled.
Administrators can restore access to disabled Team Members if/when there are sufficient seats (either by deleting existing members or upgrading your account).
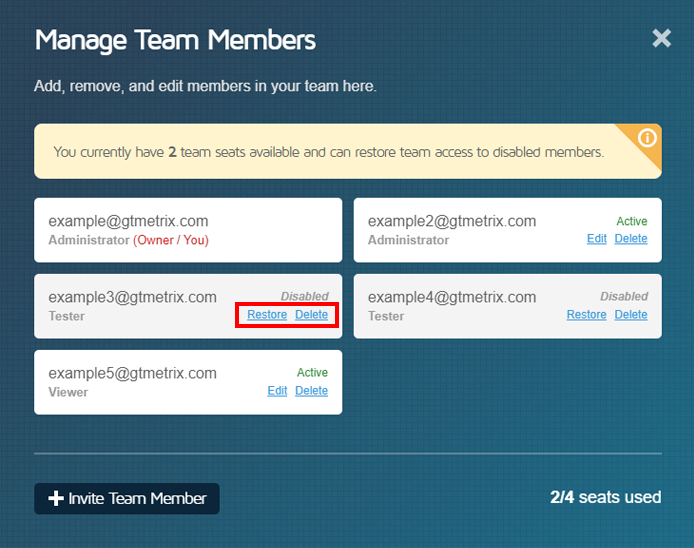
Alternatively, Administrators can delete disabled members and remove them entirely from the team.
Q) How do I leave a Team?
A) Depending on your role, here’s how to leave the Team:
For Team Members and Regular Administrators (Non-Owners)
Login to your Team Account and visit your Account page.
In the Team Settings menu, click on Leave Team.
Confirm that you wish to leave the Team by typing your e-mail address in the provided field and click on Confirm Leave.
For Administrators (Owners)
If you are the Owner of the Team, you must designate another Team Member to be the Owner first. There are 2 possible scenarios here:
If you are the Original Owner of the Team (i.e., you signed up for the PRO plan)
Transferring ownership of the account will result in losing access to your account. You do not need to do anything more as your account will no longer exist.
If ownership was transferred to you
You can proceed with the ownership transfer process, and once that’s complete, your role on the Team will be reset to Tester.
You can then leave the Team by clicking on Leave Team in the Team Settings menu on the Account page (same as other Team Members).
Q) Can an Owner switch between Team and Personal Accounts?
A) Depending on whether you are the Original Owner or if ownership was transferred to you, there are 2 possible scenarios:
If you are the Original Owner
For Original Owners (i.e., you signed up for the PRO plan), you cannot switch as your Team and Personal Accounts are the same.
If ownership was transferred to you
If ownership was transferred to you, then you can switch between Team and Personal accounts by using the dropdown on the top right hand corner.
Q) Why am I seeing an error message or a 404 page when I accept an invitation?
A) You may see an error message at the top of the Dashboard if you click on an invitation link that was not meant for you. Invitation links only work for the specific e-mails that were invited.
You’ll need to ensure you’re logged into the correct GTmetrix account to be able to join the team successfully.
You may also see a 404 page for the following reasons:
- The link has already been used.
- The link has expired.
- The invitation link is malformed.
If you think this is an error, contact your Team Administrator.
Create a Team and Share GTmetrix Access

Invite members to your team and share GTmetrix testing capabilities.
Team Logins are available on Expert, Champion, Team and Enterprise plans and as an Add-on for Custom plans.