
We discuss image optimization strategies from a web designer’s perspective.
Overview
Designers handle the look/feel, branding, and UI aspects of a web project. Once finalized, they are also responsible for generating the final production assets for developers to implement.
This is why it’s important for designers to understand the performance impact of their generated image files.
Lower file sizes help your site load faster – and improved performance directly correlates with reduced bounce rates, greater user engagement, and higher revenues.
Being a performance-minded designer can hugely add to your overall value in your team.
In this article, we’ll focus on image optimization strategies, specifically for designers.
Why Should Designers Care About Image Optimization?
Image optimization should come from the source.
You might be thinking that image optimization can/should be done by the development team; after all, you’ve done your part in creating the design right?
Well, it’s precisely for this reason why designers should take ownership in image optimization – you created the design!
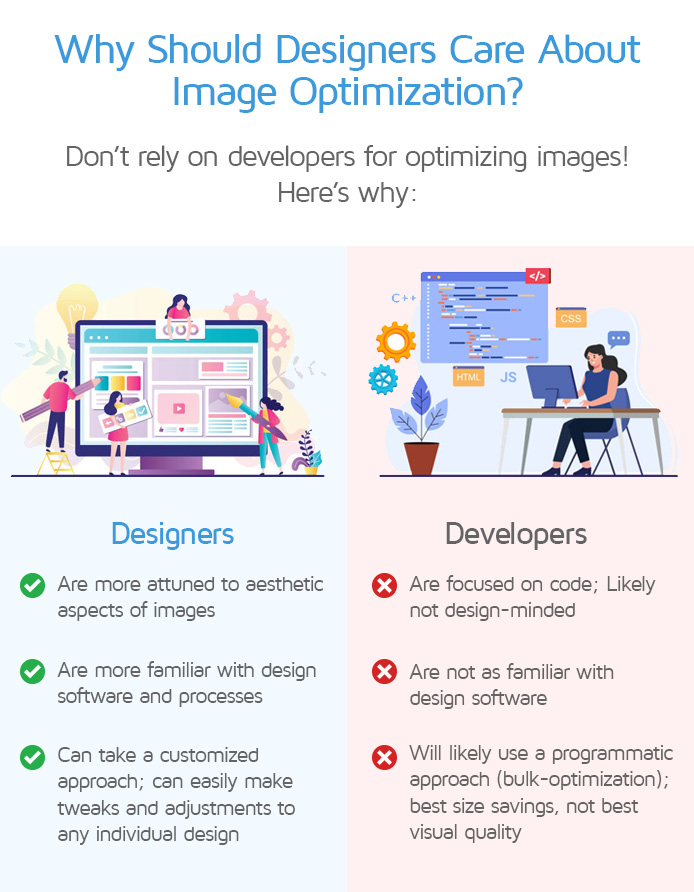
- Designers are far more attuned to the aesthetic aspects of their media files, like colour, layout, image quality, etc.
- In addition, designers are more familiar with the design software used to create media assets and can ensure a better optimized result without compromising visual appeal.
- Designers can easily make tweaks and adjustments to a media asset if the case calls for it.
In contrast, a developer may likely just bulk run images through compression and/or resizing libraries to generate the best file savings – which may not result in the best perceived quality or visual aesthetic.
Thus, it makes the most sense for a designer to provide optimized media files for usage in websites.
Below are some guidelines on how to generate lightweight, optimized media files for your projects.
1) Export Your Images at the Right Quality
Do not export at Maximum or 100% quality.
This primarily applies to JPEG, which is a lossy compression format.
Practically speaking, the vast majority of websites don’t need maximum quality images – the human eye can’t even perceive fine details beyond a certain point.
The higher the image quality, the larger the file size, and the longer it takes to load the image.
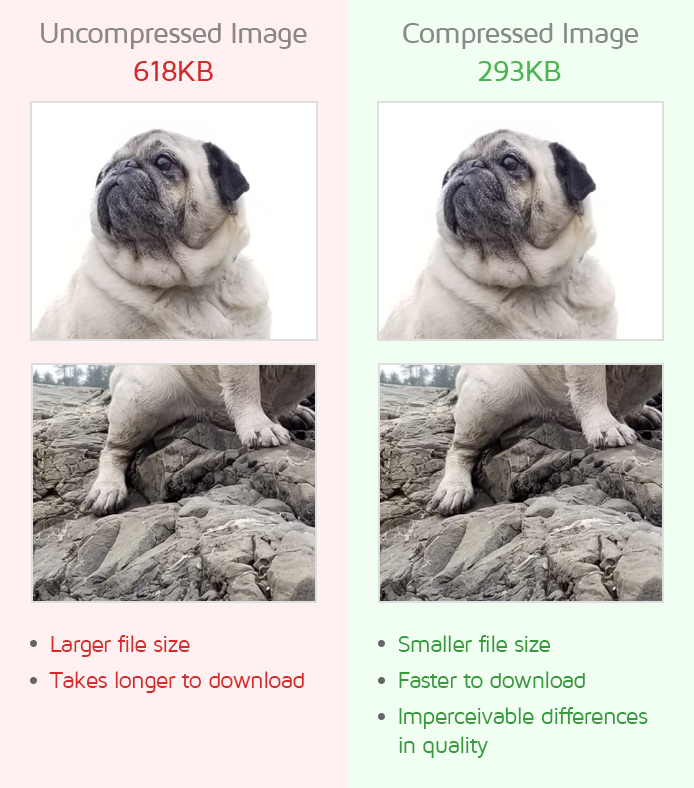
When users view images online, they (for the most part) are not going to be able to tell the difference between your original image and an image exported at a reasonably reduced quality.
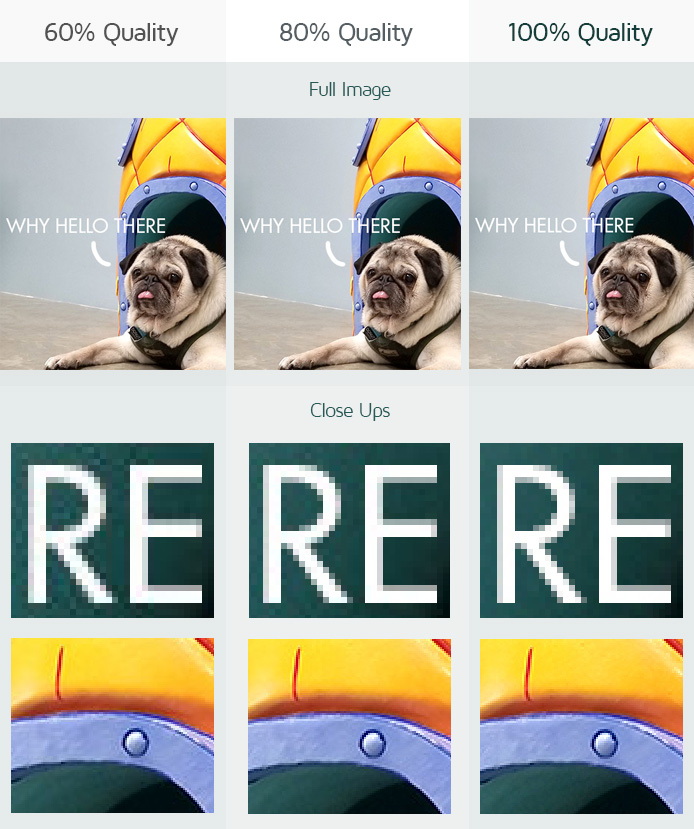
In the above comparison, you can see that there isn’t a drastic difference in appearance between the original image and the reduced quality versions.
However, the difference in file sizes are significant, and when you add up the savings of several such images, you can see why exporting at the right quality should be an important part of your workflow.
Tools like Photoshop, Lightroom have a wide variety of export/save for the web settings. Experiment with different settings to find a good balance between sharpness, quality, and file size.
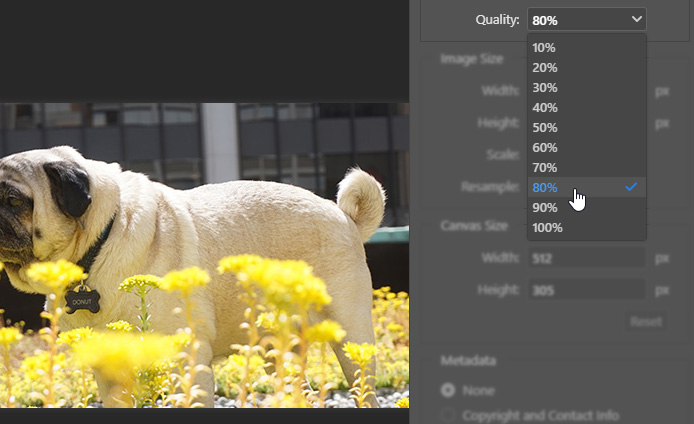
In our experience, depending on the type of image and the use case, an image quality setting of around 60-80% is recommended for most images.
2) Use the Right Sizes for Your Audience
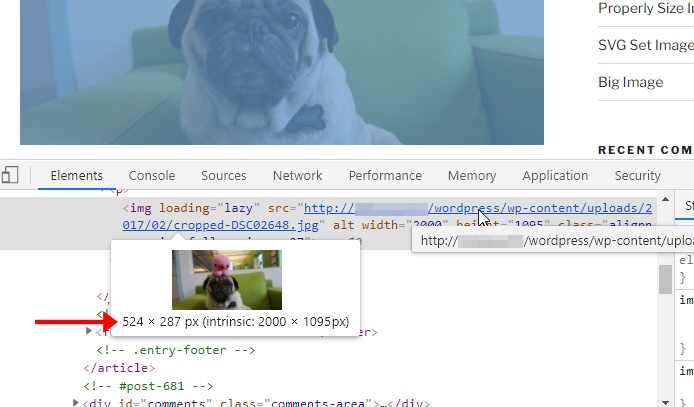
Don’t serve images that are too large in dimensions!
There is a Lighthouse audit specifically for this issue.
All too often we see images being uploaded at full resolution or with enormous dimensions, which is completely unnecessary.
A high resolution image can generate a very large file size (in terms of bytes) – as a result, your visitor’s browser must spend more time downloading the file, and increasing the bandwidth consumed.
The larger the image size, the greater the byte wastage, and the slower the image loads.
An easy way to find good dimensions to serve your image at is to look at where the image is displayed and find its maximum display size – get complete instructions on this here.
There are many more strategies on how to optimally size images – we cover them in our how to properly size images guide.
3) Compress Your Images
Exporting with Photoshop might not be enough!
When you export an image from your design software, it still likely contains extraneous pixel and/or meta data that is unnecessary for visitors to download.
Lighthouse sees such images as not “efficiently encoded,” as such images are larger than they need to be, and forces your visitors to download more data and spend more time waiting to view the image.
Compressing images can reduce/strip out extra pixel/meta data, resulting in a smaller, yet similar quality to uncompressed counterparts.
Designers should build the process of compressing images with an alternative tool whenever they export images – exporting with Photoshop isn’t enough!
You can achieve higher compression and more file size savings in a number of ways:
- Using free online tools
- Using an Image CDN
- Image CDNs can dynamically resize, optimize, and serve your images from third-party servers around the world.
- Read more on this here.
- For WordPress users
Note that the type of compression algorithm used (e.g., Lossy or Lossless) will depend on the image format (i.e., JPEG, PNG, etc.). Refer to our What Does Image Optimization Mean? article to learn more.
No matter what tool or plugin you use to compress your images, achieving a good balance of image quality and file size reductions goes a long way toward enhancing your visitors’ page experience.
4) Choose the Right Media Format
Once you’ve properly resized and compressed your images, you’ll need to ensure you export them in the proper image format.
Certain formats work best for certain types of images in terms of quality and file sizes.
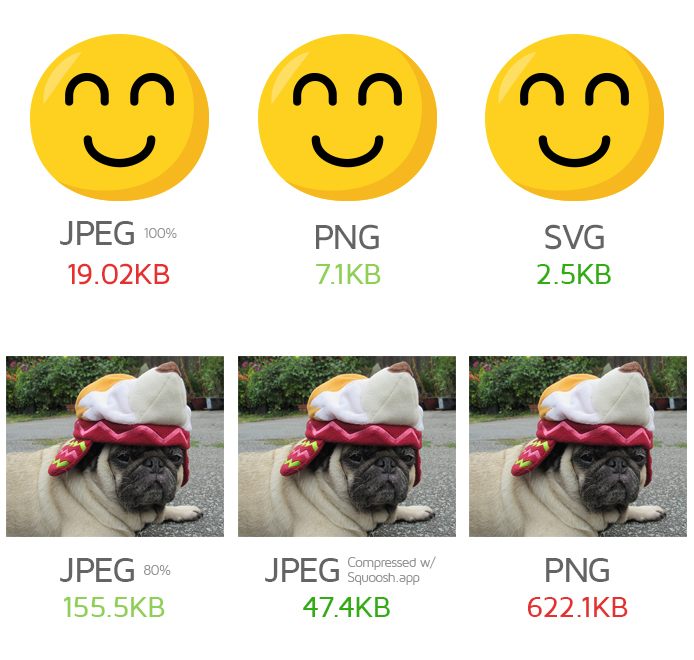
Generally speaking:
- JPEG – Photos, large detailed images
- PNG – Screenshots, transparencies, images with few colours and/or sharp edges
- SVG – Logos, icons, scalable graphics, etc.
The formats you choose should ideally provide a nice balance between quality and performance, which should directly translate into faster loading times and lower data usage for your visitors.
We’ve written a detailed guide to help you select the right image format for different use cases.
Summary
In conclusion, image optimization is a critical aspect of web design that designers should embrace as part of their workflow. By taking ownership of image optimization, designers can strike a balance between file size and visual appeal, ultimately improving website performance and user experience.
By exporting images at the right quality, using appropriate sizes, compressing effectively, and choosing the right image formats, designers can contribute to faster loading times, reduced bandwidth consumption, and overall enhanced page experiences for visitors.
Embracing image optimization strategies will not only add value to your role as a designer but also lead to happier users and better-performing websites.
Test with different countries, speeds and options
Get access to more Test Locations, Analysis Options and Connection Speeds!
Sign up for a Basic GTmetrix account and see how your site performs in more scenarios – It’s FREE!
Get Mobile Testing, Premium Locations, and more
Get more On-Demand Tests, Monitored Slots and Premium Test Locations along with Hourly testing with a GTmetrix PRO plan.
Upgrade to GTmetrix PRO and see how your site performs in all scenarios.