
Overview
Improperly sized and inefficiently encoded images carry a lot of extra weight and force your users to download unnecessary data. Optimizing your images reduces the total size of your page, meaning your page loads faster.
Read on to understand the importance of image optimization.
Users looking for a guide to optimize images can skip to our practical guide on image optimization.
Do your images need optimization?
Why should I optimize images?
Images carry a large footprint (compared to HTML/CSS/JS) in terms of your Total Page Size. Think about how you acquired your images:
- A stock photo website?
- A camera?
- A mobile device?
- A web search?
Most of these images were likely captured in a very high, print-ready quality. Some may have been resized to something more suitable for the Internet, but some aren’t.
Generally, these images are not optimally compressed and contain extra data that serves no purpose for the user, and are larger in file size than they need to be.
What happens when you use unoptimized images
Using improperly sized, inefficiently encoded images on your website has a high impact on your page load. Here’s what happens:
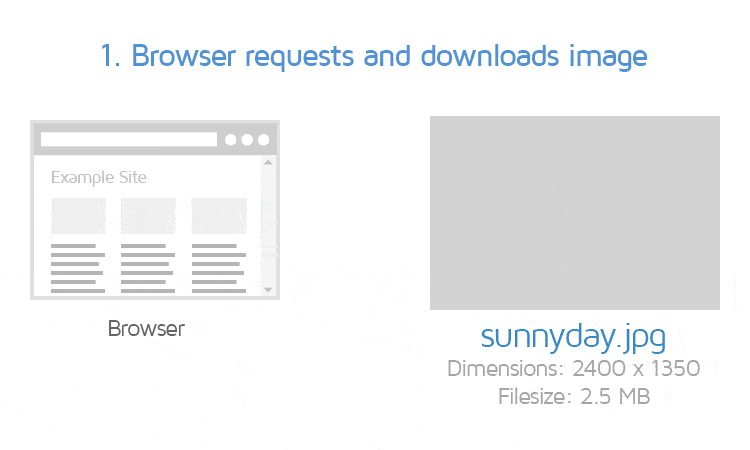
1) The browser requests and downloads the image – it’s 2400 x 1350 and 2.5MB!
2) Based on the design of your site, the HTML/CSS resizes the image to fit your thumbnail area of 300 x 169.
3) The browser renders the resized image on your page.
By using unoptimized images, you forced your user to download more data than they needed to. Here’s why:
- The image only needed to be 300 x 169; you used a 2400 x 1350 image
- The image was exported at 12 / 100% / Maximum quality – this level of quality is typically reserved for print
- …or the image was taken directly from your phone/camera/the Internet – potentially containing metadata, colour profiles and an unnecessarily high quality.
When this happens for more than one image on your page, things can add up and result in a slower performing webpage.
What happens when you use optimized images
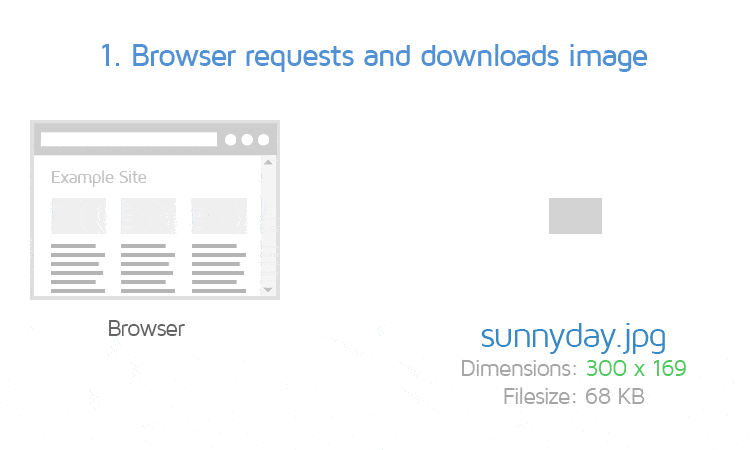
1) The browser requests and downloads the image – it’s now only 300 x 169 and 68kb!
2) No HTML/CSS resizing is needed, so the browser renders the image as is on your page.
The result is a much faster downloading and rendering of the image(s) on your site.
What is image optimization?
For the purposes of this article, we’re going to focus on the file size issues with inefficiently encoded and/or improperly sized images.
However, there are other important areas that image optimization affects (e.g., Cumulative Layout Shift).
Smaller file size = Reduced download time = Faster page load
The key concepts of image optimization boil down to proper image dimensions (visual size, width x height) and efficient encoding (compression, image quality).
Dimensions (Sizing)
Images with large dimensions come with large file sizes. Moreover, it requires work for the browser to resize the image to fit the intended display in the page layout.
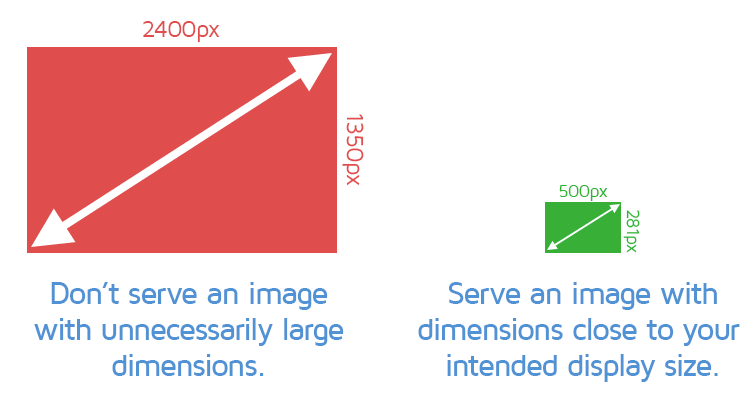
Properly sizing your images, that is, serving your images at their maximum display size (the largest size they might be on the page given a viewport), ensures the browser doesn’t need to download unnecessary data, and waste time resizing the image.
Relevant GTmetrix audit: Properly size images
Encoding (Compression)
Encoding primarily deals with compression and image quality.
An efficiently encoded image reduces the file size of the image, ensuring a faster download time for your visitors.
Encoding (or compression in this context) comes in two methods – lossy and lossless.
1) Lossy Compression
In the most basic definition, lossy compression algorithms attempt to find and reduce redundant pixels within an image.
Of course, the more aggressive you are with this, the more pixels you’ll strip from the image, reducing quality.
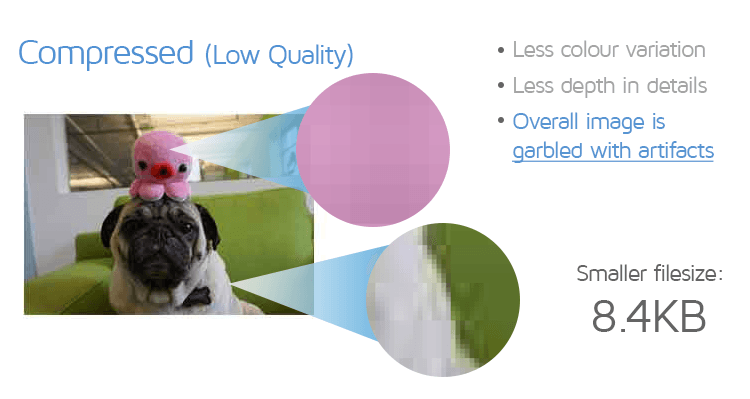
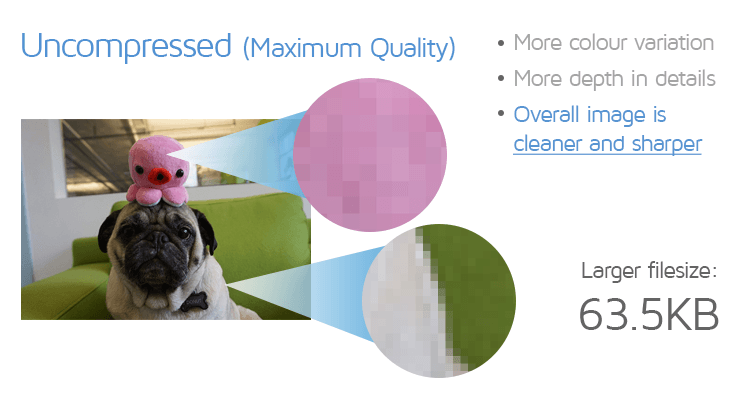
Compared to a completely uncompressed image, there is far more pixel data and details, which results in a clearer image (and larger file size).
The simplest example of compression is saving your images for the web (via Photoshop). This includes selecting the export quality that best balances file size savings and image quality.
The more you reduce the file size, the more you reduce the quality of your image. Learn more about lossy compression here.
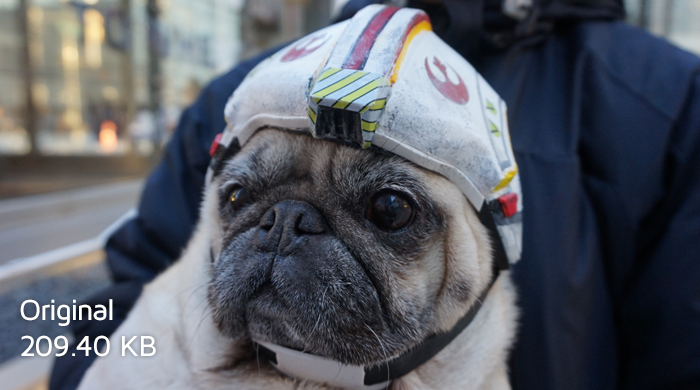
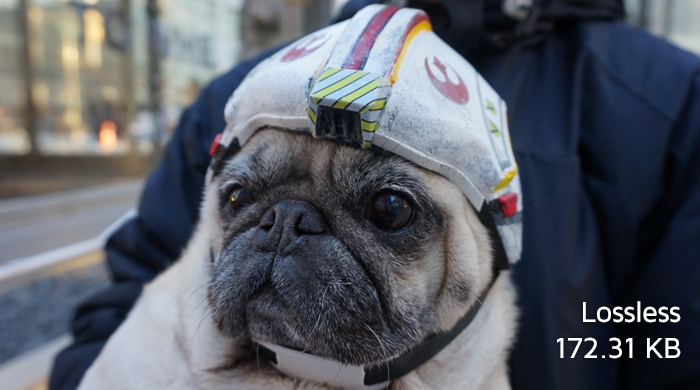
2) Lossless Compression
Lossless compression results in your image quality remaining absolutely the same; however, the data that makes up your image is organized in a more efficient and compact manner, resulting in a smaller file size.
Efficiently encoding your images is a must and can yield impressive file savings without much effort.
Modern image compression tools use highly advanced algorithms based on either lossy or lossless methods to compress your images and reduce file size while retaining image quality.
Relevant GTmetrix audit: Efficiently encode images
More optimization
In addition to optimizing dimensions and compression, image optimization also includes stripping out extraneous data that your users don’t need.
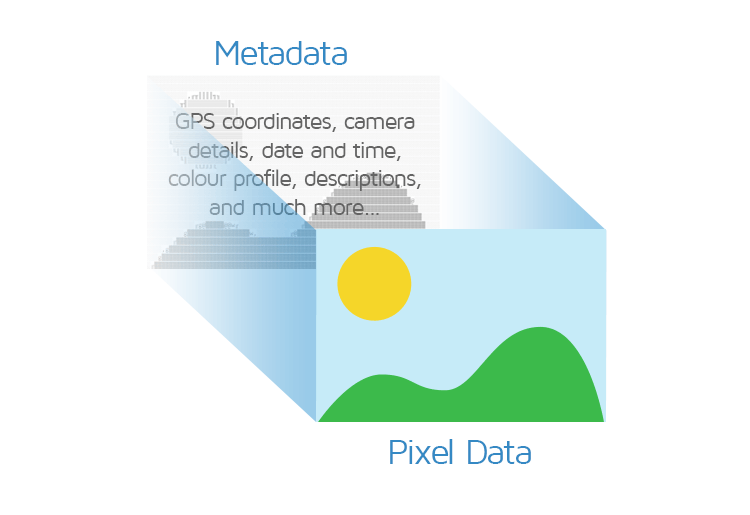
In an image file, there exists layers of data that isn’t seen by the average user. This includes general metadata like EXIF data, colour profile information and date/location.
Removing this data altogether from the image leaves only the visible pixel data – the actual data that the user sees, which results in a smaller file size for the image.
“Properly sizing images” and the responsive web
So you have a responsive design for your website, and GTmetrix is alerting you to “Properly size images.” Isn’t there a conflict here? You might be asking:
Since responsive design resizes and scales images, it’s not realistic to serve images in the size they’ll be displayed at, because that viewport can change.
The main goal behind the “Properly size images” audit is to ensure that the served images aren’t drastically out of scale.
A general rule then is to serve images at the maximum display size in your design. To be safe with retina displays, you can scale them up to 2x the maximum display size.
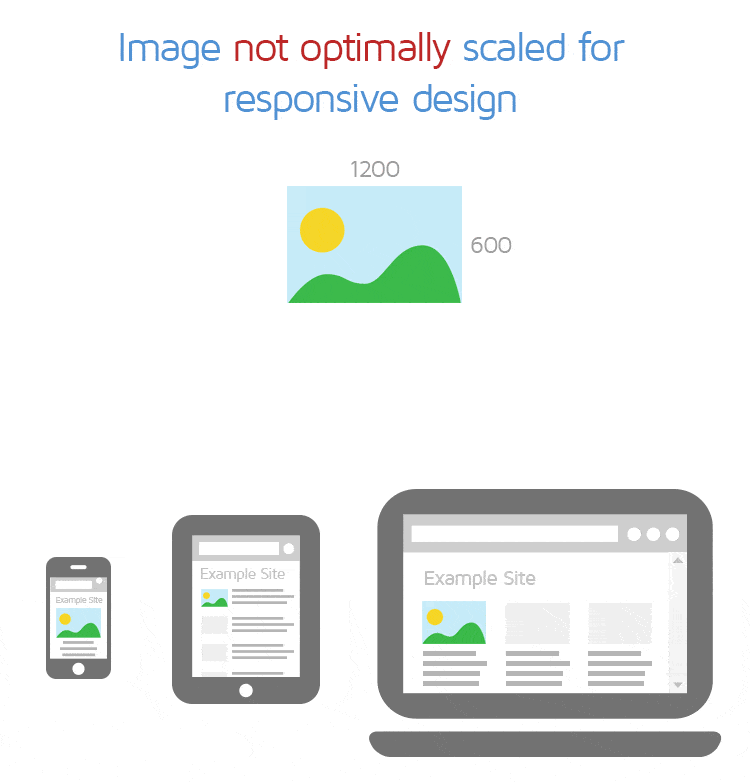
This will ensure maximum flexibility with responsive designs, as well as, optimal quality for high-density pixel displays.
There’s also the usage of srcset and CMS handling of responsive images which you can read about here.
So how do you optimize images?
This explanatory guide was meant to give you a good understanding of the core concepts behind image optimization. Next in our series, we’ll show you exactly how to properly size and efficiently encode images so that you can optimize your website’s image footprint.
Read our Part 2 in this series: How to Optimize Images: A Practical Guide