Last Updated:
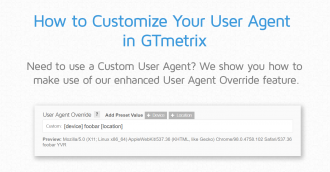
Save your favourite and most used analysis options in a Preset for convenient one-click analysis.
Overview
Testing your page in multiple scenarios is key when it comes to optimizing for performance.
We’ve made it easier to do so with Analysis Presets, which lets you quickly test with your preferred/favourite/frequently-used Analysis Options.
What do Analysis Presets do?
With Analysis Presets, you’re able to save your preferred analysis options into a button. Any combination of options and settings can be turned into a Preset.
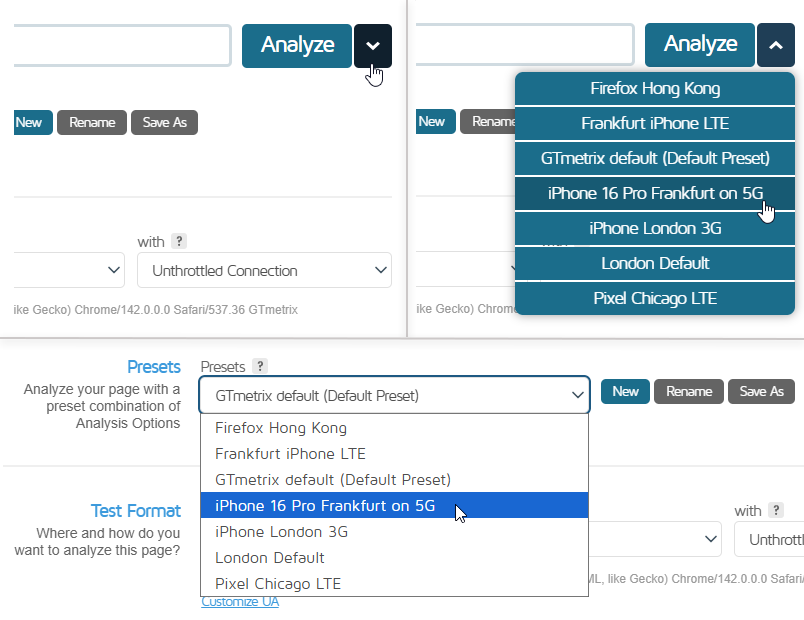
Presets are listed in 2 spots on the Dashboard:
- Dropdown located in the Analyze button (arrow next to button)
- Presets dropdown in the Analysis Options
Presets make it easy for you to test your page with a variety of options pre-selected for your convenience.
You could have Presets made for the following options:
- Test with Adblock
- Enable Adblock
- iPhone XR in London, UK on 3G Connection
- Device: Apple iPhone XR
- Test Location: London, UK
- Connection Speed: 3G (1.6 Mbps/768 Kbps, 200ms)
- iPhone 16 Pro in Frankfurt, Germany on 5G connection
- Device: Apple iPhone 16 Pro
- Test Location: Frankfurt, Germany
- Connection Speed: Custom(200/25 Mbps, 20ms)
- …or any combination of options!
How to Use it
First, you must set up a Preset, which is done on the GTmetrix Dashboard.
Expand the Analysis Options – You’ll notice a new Presets dropdown menu with a Default Preset selected.
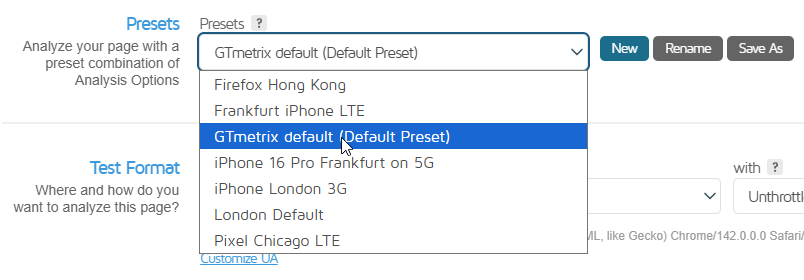
The initial Preset will be the GTmetrix Default – 1366×768, Chrome using an Unthrottled connection. This is the only Preset that you cannot delete.
Click New, and enter a name for your Preset.

Select and enable whatever options you wish to analyze with. This also includes options like cookies or HTTP Authentication credentials or any other features available under Analysis Options; click Save.
Your new Preset is now available in the Analyze button dropdown and Preset dropdown!
Note that depending on your plan level, certain locations or devices may not be available on your plan. If you find that to be the case, consider upgrading your plan for full access.
Analyzing With a Preset
There are a few ways to analyze your page with a Preset.
1) From the Dashboard with the Analyze button dropdown
The fastest way to analyze with a Preset. Enter your URL, click on the dropdown arrow and select a Preset. GTmetrix will start analyzing with your Preset options.
2) From the Dashboard with Analysis Options expanded, using the Presets dropdown
A good way to check your options before analyzing. Enter your URL, expand the Analysis Options section, and select a Preset.
Your options will change accordingly. Click Analyze to test with your selected Preset.
Set a Default Preset
You can set a default Preset for GTmetrix to use for all tests going forward.
Once you set up your Presets, visit your User settings on the Account page, and select your desired Preset to use by default.
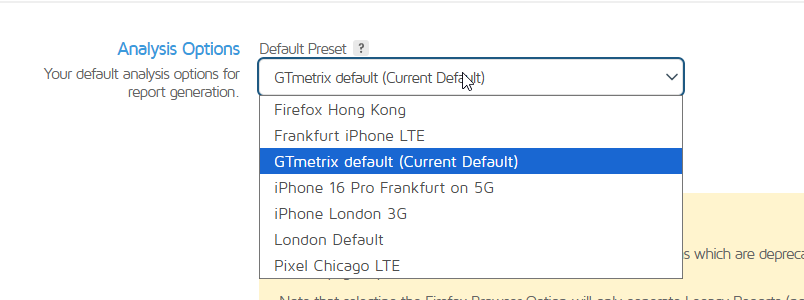
Now all your tests will use this Preset without you having to select it!
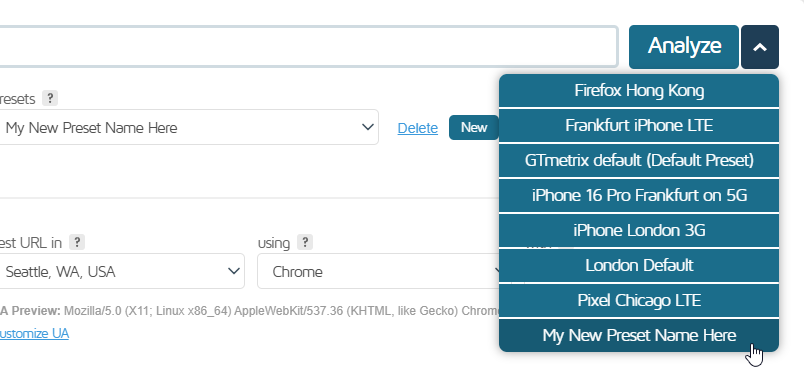
Modifying a Preset
If you need to modify a Preset, simply select the Preset on the Dashboard using the Presets dropdown.
Make whatever changes you need to make, then click on Save to apply your changes.
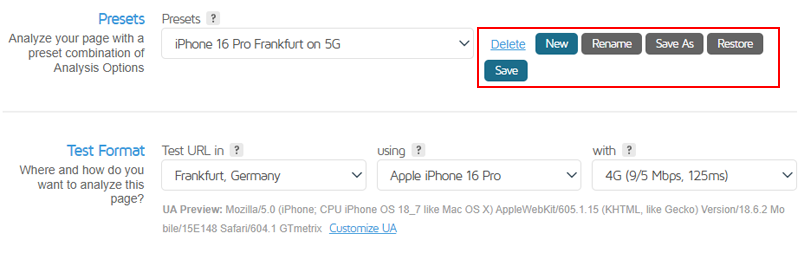
You can also create a new Preset from an existing Preset by loading that Preset, making changes, then clicking on Save As.
Click on Delete if you wish to delete the Preset.
Frequently Asked Questions (FAQ)
Here are some common questions regarding Analysis Presets in GTmetrix.
What are Analysis Presets in GTmetrix?
Analysis Presets allow you to save a combination of test options (i.e., device, location, connection speed, etc.) and reuse them for future tests with a single click.
Why should I use Analysis Presets?
Analysis Presets help you:
- Save time when running repeated tests
- Quickly test pages across multiple environments (e.g., mobile, desktop, different regions)
- use a different set of default Analysis Options
Where can I find Analysis Presets?
Presets are available in two places on the Dashboard:
- The Analyze button dropdown (arrow next to the Analyze button)
- The Presets dropdown within the Analysis Options panel
Who can use Analysis Presets?
Analysis Presets are available to all users, including Basic/Free users.
Depending on plan level, certain devices/locations you wish to save as a Preset may need upgrading to a higher plan tier.
What types of settings can I include in a Preset?
You can include any available Analysis Options, such as:
- Device (e.g., Desktop or any mobile device)
- Test Location
- Connection Speed
- Video and/or Adblock enabled
- Cookies and/or HTTP Authentication
- Other Advanced Options
Can I create multiple Presets?
Yes. You can create multiple Presets for different testing scenarios, such as:
- Mobile vs desktop testing
- Different geographic locations
- Various connection speeds (e.g., 3G, 5G)
What is the default GTmetrix Preset?
The GTmetrix Default Preset uses the following settings:
- 1366×768 Screen Resolution
- Desktop Chrome browser
- Unthrottled connection
This Preset cannot be deleted, but you can set a different Default Preset.
How do I create a new Analysis Preset?
To create a Preset, follow these steps:
- Expand Analysis Options on the Dashboard
- Click New next to the Presets dropdown
- Enter a Name for your Preset
- Select your desired Analysis Options
- Click Save
How do I run a GTmetrix test using a Preset?
You can analyze a page using a Preset in one of two ways:
1) Analyze button dropdown
- Enter your URL
- Click the dropdown arrow next to the Analyze button
- Select your Preset
2) Analysis Options panel
- Enter your URL
- Expand Analysis Options
- Select a Preset from the dropdown
- Click Analyze
What is the fastest way to use a Preset?
The fastest method is using the Analyze button dropdown, which lets you start a test immediately with your selected Preset.
Can I set a new Default Preset for all tests?
Yes, you can set a new Default Preset in your User Settings on the Account page.
Once set, all future tests will automatically use that Preset unless changed.
How do I modify an existing Preset?
To modify a Preset, follow these steps:
- Select the Preset from the Presets dropdown
- Update the desired settings
- Click Save
Can I duplicate a Preset?
Yes. You can create a new Preset from an existing one. Follow these steps:
- Navigate to the Presets dropdown on the Analysis Options panel
- Select the Preset
- Click Save As
- Make your changes, give your new Preset a name, and click Save
Can I Delete a Preset?
Yes. From the Presets dropdown on the Analysis Options panel, select your Preset and click Delete.
Note: The original GTmetrix Default Preset cannot be deleted.
Fine-tune your site performance with Hourly Monitoring
Get more frequent analysis done and keep a closer eye on your site performance with Hourly monitoring.
Available with select PRO plans.
Other features include: Priority access for tests, More Locations, More Monitored Slots, More On-Demand Tests, Remote Location Monitoring, and more!