
Last Updated:
Need to use a Custom User-Agent? We show you how to make use of our enhanced User Agent Override feature.
Overview
GTmetrix users have the ability to customize the User-Agent string so that GTmetrix will override the default User-Agent and present itself as your chosen device/browser.
Read on to learn how to utilize this feature.
Default GTmetrix User-Agent
First note that our default User-Agent string (Desktop and Simulated Devices) now contains the text GTmetrix at the end.
With this change, the default GTmetrix User-Agent becomes (as of November 17, 2025):
Mozilla/5.0 (X11; Linux x86_64) AppleWebKit/537.36 (KHTML, like Gecko) Chrome/142.0.0.0 Safari/537.36 GTmetrix
Note that our default User-Agent string may change in the future (e.g., when we update browser versions), but it would always have the “GTmetrix” text at the end.
User-Agent Customization
User Agent Override is located under Advanced Options, both on the Dashboard and in the Page Settings of the GTmetrix Report.
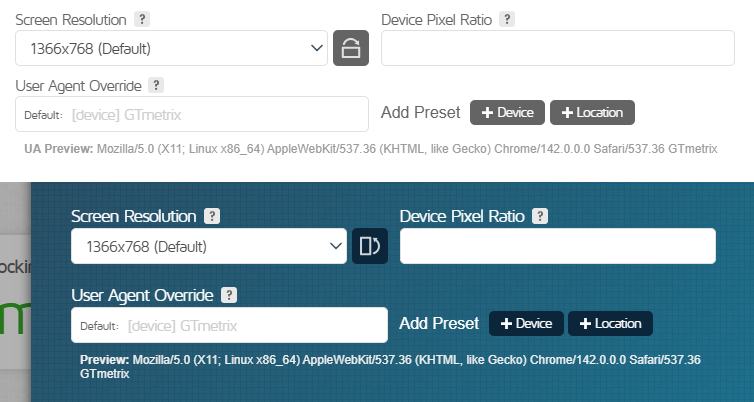
You can input any value you wish as the User-Agent, as well as use preset values to help create a customized User-Agent that suits your needs.
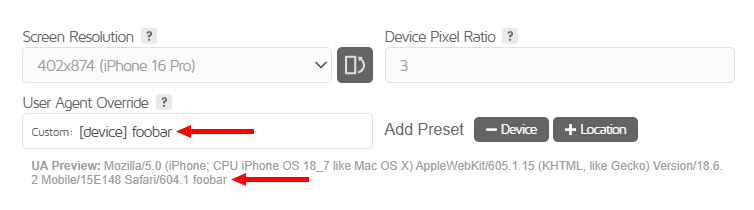
For example, you could create a User-Agent as:
[device] Foobar
and GTmetrix will present the following as the User-Agent:
Mozilla/5.0 (X11; Linux x86_64) AppleWebKit/537.36 (KHTML, like Gecko) Chrome/98.0.4758.102 Safari/537.36 Foobar
We have provided two preset values Device and Location to prepopulate standard UA values. More preset values may be introduced in the future.
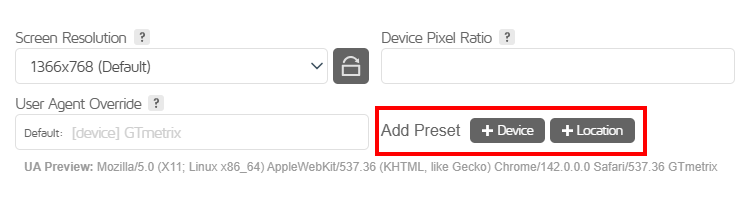
Clicking on either preset (+ sign) adds the relevant device or location to the User-Agent string. You can also type the preset yourself (i.e., [device], [location]), which does the same thing as clicking on the preset value.
Whether you use the presets or not (you could type the whole UA string if you want!), you can see what the actual User-Agent output will be in the Preview below the User-Agent Override field.
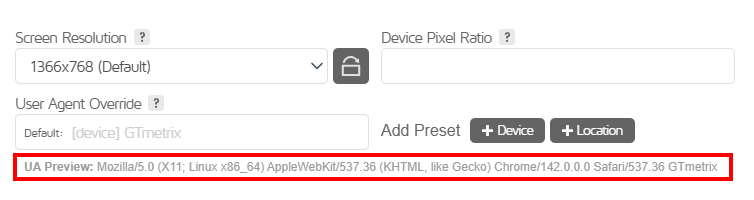
We explain how the templating feature works below.
How it Works
Here’s how the templating feature works from your GTmetrix Dashboard:
Default (Empty)
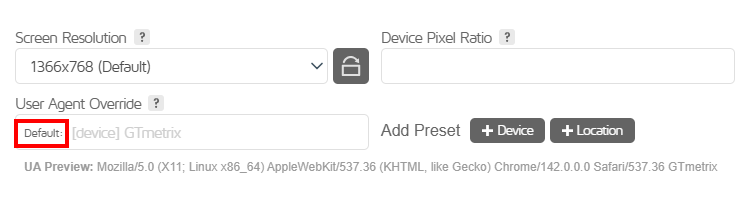
If nothing has been entered in the User Agent Override field, GTmetrix will use the default User-Agent string for the chosen device. This is the case whether you’re using the Desktop Chrome browser or any of the Simulated Devices.
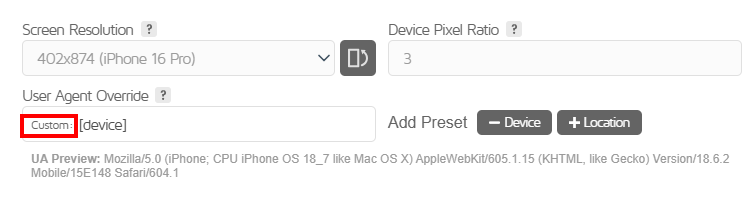
The Default tag will be displayed in the field.
Customized
Editing the User-Agent will set the UA as anything you define here (note that “GTmetrix” will be removed as well; you can always add it back in if you wish).
Once you edit the User-Agent field, the Default tag will change to Custom.
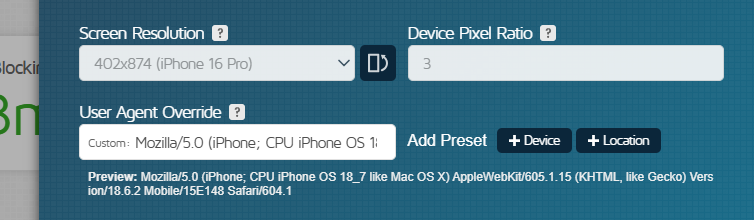
Clicking on [+ Device] adds the User-Agent of the chosen device to the field.
While the field will only show
[device], you can see the actual output in the Preview.
Naturally, if you change the device in the Test Format section above, the Custom User-Agent will change accordingly.
If you click on [+ Location], the 3 letter location code for the Test Server Location is automatically added (e.g., SEA for Seattle, LHR for London, etc.).
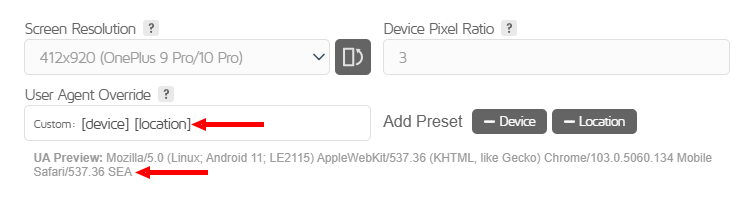
Similar to the device preset, the field will show [location] and the actual output can be seen in the Preview.
Changing the location from the Test Format dropdown also changes the location code in the User-Agent field accordingly.
You can also modify the User-Agent in the Page Settings of a Report in the same manner.
Note that if you launch a test from the Dashboard (with the custom User-Agent string), and then click on Page Settings of the GTmetrix Report, you will see the actual User-Agent output (i.e., entire User-Agent string) in the User Agent Override field.
In other words, the Page Settings saves the entire User-Agent String and not just the template.
Some Usage Scenarios
Now that we’ve covered how the templating feature works in general, here are a few usage scenarios to consider:
Create Analysis Presets for One-Click Custom User-Agent Testing
With Analysis Presets, you can save your preferred Analysis Options into a button for convenient one-click analysis. You can also save your Custom User-Agent string with your Analysis Preset.
Once you’ve created your Custom User-Agent using the template, click on New in the “Presets section“, name the Preset and click on Save.
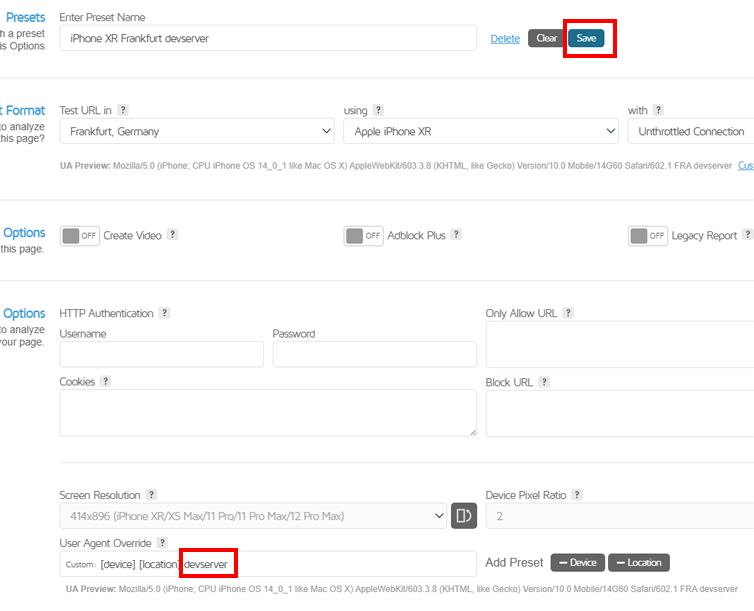
The Analysis Preset always saves the template so when you switch between different Presets, look at the Preview to make sure you’re testing with the desired User-Agent string.
Learn more on how to use Analysis Presets.
Use a Custom User-Agent with Simulated Devices
Simulated Devices testing already works by modifying the User-Agent string, along with the Device Pixel Ratio and the Screen Resolution.
You can modify the User-Agent string further, which is useful if you have User-Agent based filtering for your site.
For example, use this to add a custom identifier (for example “foobar”) to the end of your Simulated Devices User-Agent string.
Summary
GTmetrix users can use the “User Agent Override” field to enter their own Custom User-Agent for advanced testing and deeper insights.
You can use the preset values (especially for Simulated Devices) instead of entering the entire User-Agent string to easily customize your User-Agent string.
If you employ User-Agent based filtering, check out the scenarios listed in this guide and give it a try.
Frequently Asked Questions (FAQ)
Here are some common questions about customizing your User-Agent in GTmetrix.
What is User-Agent Override in GTmetrix?
User-Agent Override allows you to customize the User-Agent string used during a GTmetrix test. This lets GTmetrix present itself as a specific browser, device, or custom identifier.
Why would I use a custom User-Agent?
Custom User-Agents are useful when you:
- Test how your site responds to different devices or browsers
- Work with User-Agent-based content or filtering
- Add identifiers to track or segment test traffic
- Simulate specific environments beyond default settings
Where can I find the User-Agent Override option?
User-Agent Override is available under Advanced Options in 2 locations:
- The GTmetrix Dashboard
- The Page Settings of a GTmetrix Report
What is the default GTmetrix User-Agent?
The default User-Agent is based on the selected device/browser and includes “GTmetrix” at the end of the string.
This identifier helps distinguish GTmetrix traffic from regular users. Note that the default User-Agent may change as browser versions are updated, but it will always include “GTmetrix” at the end.
What happens if I leave the User-Agent Override field empty?
If the field is empty, GTmetrix uses the default User-Agent for the selected device.
The field will display a Default tag.
What happens when I customize the User-Agent?
Once you enter a value, the field switches to Custom, and GTmetrix will use your defined User-Agent string instead of the default.
How do preset values work??
Preset values are placeholders that automatically insert dynamic values into your User-Agent string:
[device]– Inserts the selected device’s User-Agent[location]– Inserts the test server’s 3-letter location code (e.g., LHR for London)
You can either click the preset buttons to insert them, or manually type [device] or [location].
GTmetrix replaces these placeholders with actual values in the Preview output.
Does the User-Agent update when I change device or location?
Yes. If you use [device] or [location], the User-Agent string updates automatically when you change:
- The selected device
- The test server location
Can I enter a full custom User-Agent manually?
Yes. You can input a complete User-Agent string without using presets if you prefer full control.
Does customizing the User-Agent remove “GTmetrix” from the string?
Yes. When you override the User-Agent, the default “GTmetrix” identifier is removed, unless you manually include it.
Can I use User-Agent Override with Simulated Devices?
Yes, you can customize the User-Agent even when using Simulated Devices, allowing more advanced testing scenarios.
Can I use User-Agent Override with Analysis Presets?
Yes, you can save your custom User-Agent string as part of an Analysis Preset for quick, one-click testing.
What should I check in the User-Agent string when switching Presets?
Since Presets save templates, always check the Preview to confirm the final User-Agent string before running a test.
Fine-tune your site performance with Hourly Monitoring
Get more frequent analysis done and keep a closer eye on your site performance with Hourly monitoring.
Available with select PRO plans.
Other features include: Priority access for tests, More Locations, More Monitored Slots, More On-Demand Tests, Remote Location Monitoring, and more!